> ## Documentation Index
> Fetch the complete documentation index at: https://easy-peasy.ai/docs/llms.txt
> Use this file to discover all available pages before exploring further.
# Templates and one-click tools
> Start from a ready-made look, or run a one-click tool such as Ghiblify, Caricature, or Remove Background.
When you don't want to write a prompt from scratch, start from a template or a tool. Both live in the right half of **AI Images**.
## Use a template
Templates are ready-made looks: product mockups, posters, portrait styles, filters, and more. Each one comes with a tested prompt, the model it was made for, and a sample photo you swap for your own.
Open the **Templates** tab and filter by category, such as **New**, **Starring You**, **Product**, or **Mockups**. Hover over a template and click **Use template**.
The left panel fills in: the template appears at the top, with its prompt and model below it. Its sample photo sits in the **Customize** row. Remove the sample with its X, then add your own photo with **Upload**, **Character**, or **Object**, or pick one of your past images from **History**.
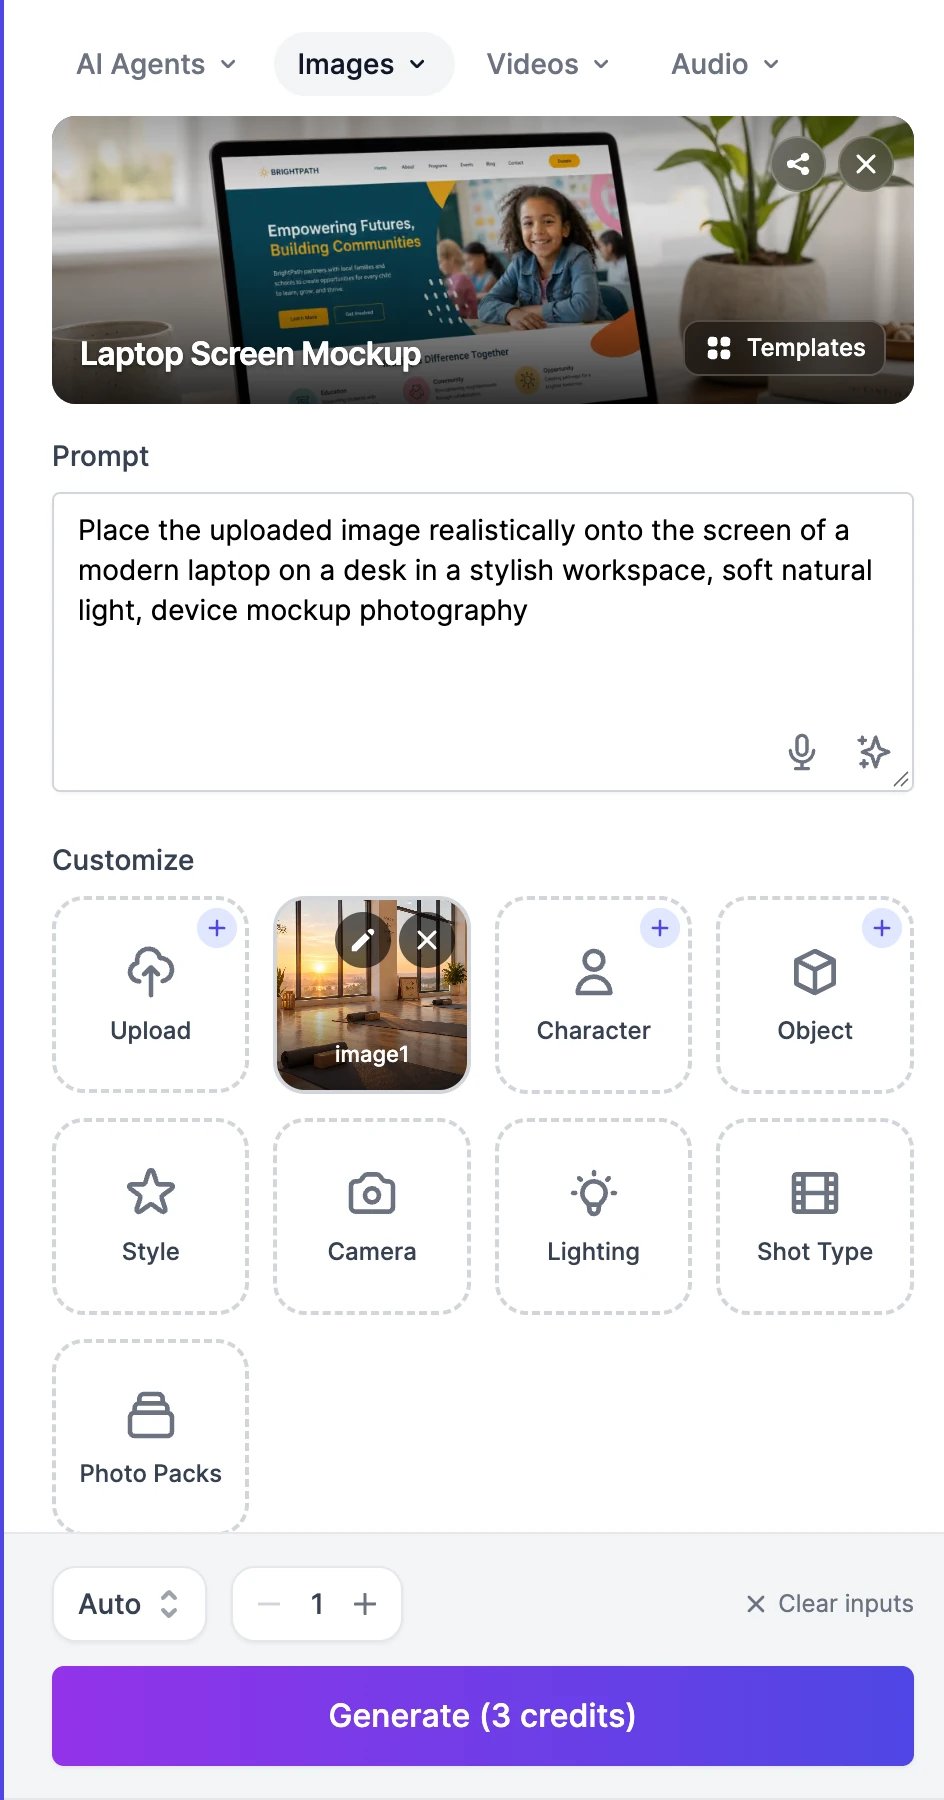 Templates in **Starring You** need a photo of a person. Product templates need a photo of the product.
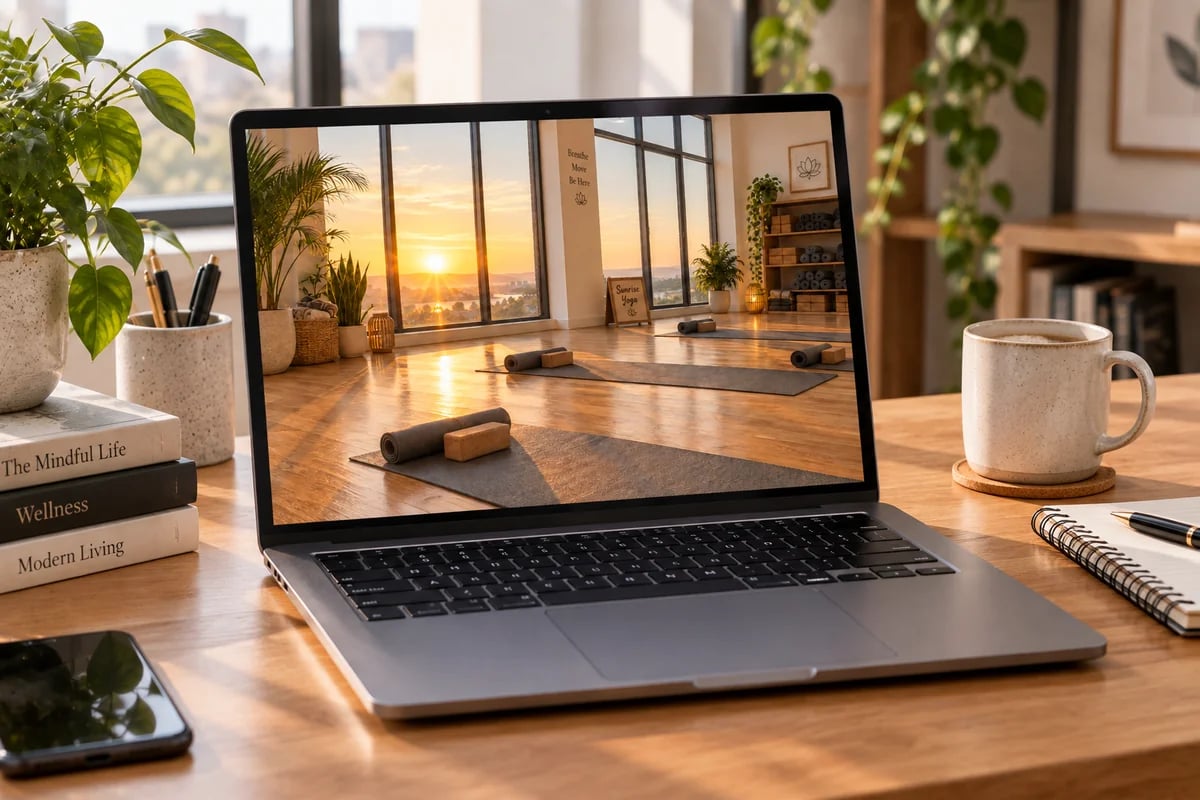
Change the prompt if you like, then click **Generate**. This example put the yoga studio image on a laptop screen:
Templates in **Starring You** need a photo of a person. Product templates need a photo of the product.
Change the prompt if you like, then click **Generate**. This example put the yoga studio image on a laptop screen:
 To stop using a template, click the X on the template card at the top of the panel. It clears what the template filled in and keeps the rest.
When you switch from one template to another, check the **Customize** row for a photo left over from the previous template, and remove it if you don't need it.
## One-click tools
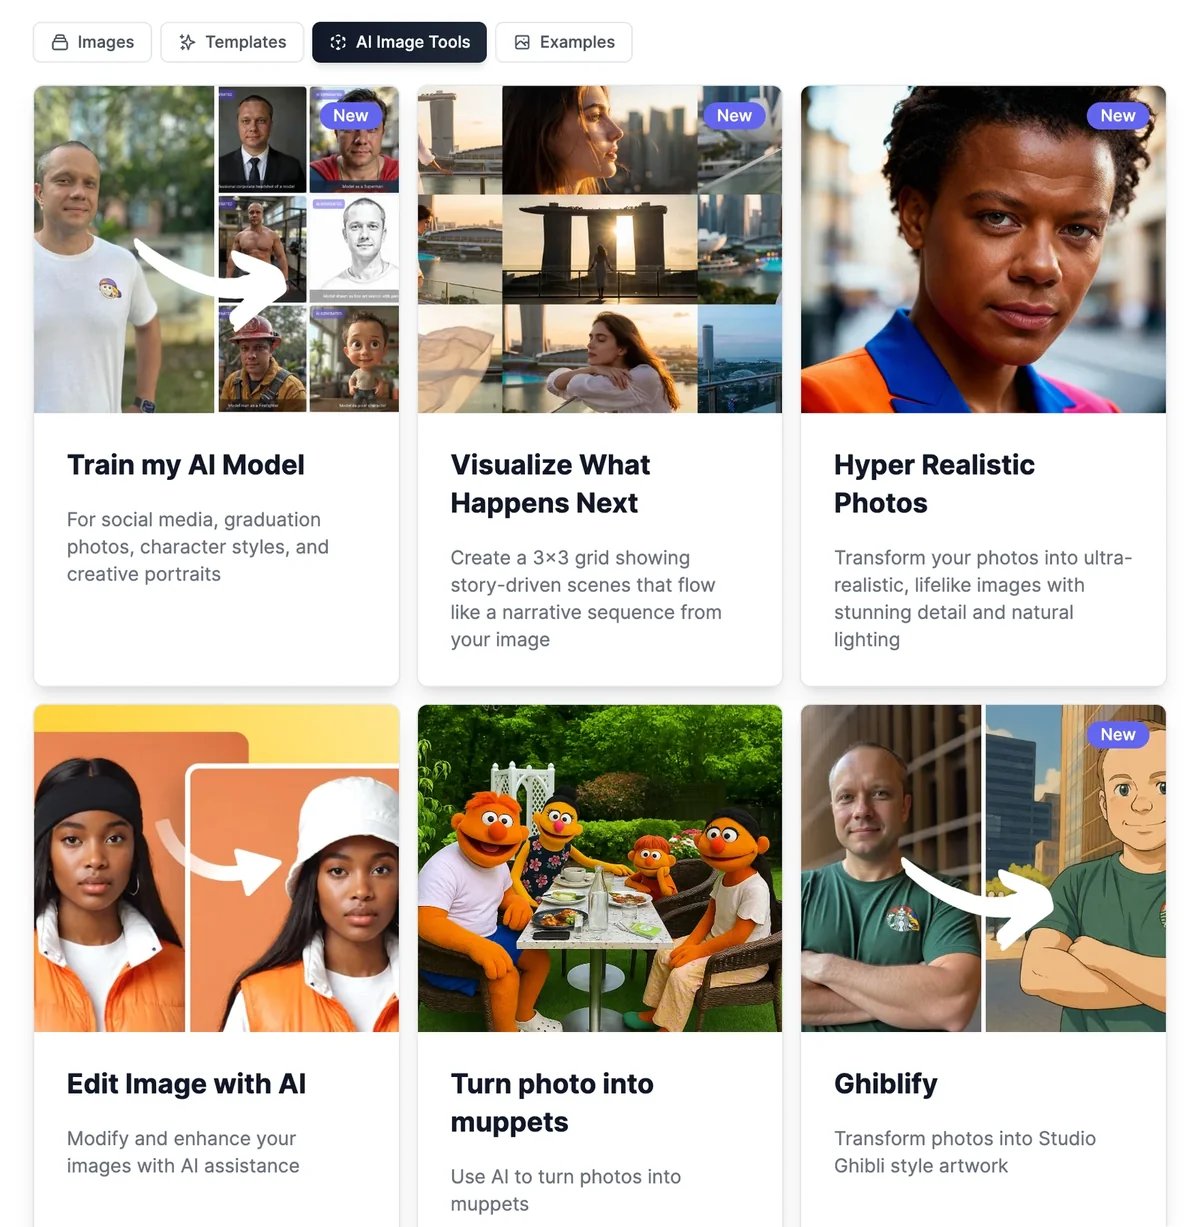
The **AI Image Tools** tab lists jobs that need only a photo. Some also appear in the **Action** menu that shows up when you add a photo on AI Images.
To stop using a template, click the X on the template card at the top of the panel. It clears what the template filled in and keeps the rest.
When you switch from one template to another, check the **Customize** row for a photo left over from the previous template, and remove it if you don't need it.
## One-click tools
The **AI Image Tools** tab lists jobs that need only a photo. Some also appear in the **Action** menu that shows up when you add a photo on AI Images.
 | Tool | What it does | Credits |
| ------------------------------------------------ | ------------------------------------------------------------------------------------------------------- | ----------- |
| **Remove Background** | Cuts the subject out onto a transparent background | 1 |
| **Replace Background** | Puts the subject in front of a new background you describe | 2 per image |
| **Caricature** | Turns a portrait into a caricature | 2 per image |
| **Ghiblify** | Redraws a photo as Studio Ghibli–style artwork | 2 per image |
| **Turn photo into muppets** | Turns the people in a photo into puppets | 2 per image |
| **Hyper Realistic Photos** | Makes a photo look more realistic and detailed | 2 per image |
| **Visualize What Happens Next** | Draws a 3×3 grid of scenes that continue the story of your image | 12 |
| **Stylization** | Makes eight stylized portraits at once, such as manga, claymation, oil painting, and sketch. Paid plans | 16 |
| **Colorize** (in the **Action** menu) | Adds color to a black-and-white photo | 8 per image |
| **Character Reference** (in the **Action** menu) | Puts the same person into a new scene | 8 per image |
These cards open other tools instead:
* **Edit Image with AI**, **Sketch to Image**, and **Style Transfer** open AI Images ready to edit. Add your photo and describe the result you want. See [Edit images](/docs/ai-images/edit).
* **Creative Upscale** opens the [Magic Upscaler](/docs/ai-images/upscale).
* **Animate Image** opens [AI Videos](/docs/videos/generate) to turn the photo into a video.
* **Headshot Generator**, **Train my AI Model**, and **Interior & Exterior Design** open [Headshots](/docs/ai-images/headshots), [AI Photo Studio](/docs/ai-images/photo-studio), and [Interior Designer](/docs/ai-images/interior-designer).
Step by step, with examples.
Prices for every model.
| Tool | What it does | Credits |
| ------------------------------------------------ | ------------------------------------------------------------------------------------------------------- | ----------- |
| **Remove Background** | Cuts the subject out onto a transparent background | 1 |
| **Replace Background** | Puts the subject in front of a new background you describe | 2 per image |
| **Caricature** | Turns a portrait into a caricature | 2 per image |
| **Ghiblify** | Redraws a photo as Studio Ghibli–style artwork | 2 per image |
| **Turn photo into muppets** | Turns the people in a photo into puppets | 2 per image |
| **Hyper Realistic Photos** | Makes a photo look more realistic and detailed | 2 per image |
| **Visualize What Happens Next** | Draws a 3×3 grid of scenes that continue the story of your image | 12 |
| **Stylization** | Makes eight stylized portraits at once, such as manga, claymation, oil painting, and sketch. Paid plans | 16 |
| **Colorize** (in the **Action** menu) | Adds color to a black-and-white photo | 8 per image |
| **Character Reference** (in the **Action** menu) | Puts the same person into a new scene | 8 per image |
These cards open other tools instead:
* **Edit Image with AI**, **Sketch to Image**, and **Style Transfer** open AI Images ready to edit. Add your photo and describe the result you want. See [Edit images](/docs/ai-images/edit).
* **Creative Upscale** opens the [Magic Upscaler](/docs/ai-images/upscale).
* **Animate Image** opens [AI Videos](/docs/videos/generate) to turn the photo into a video.
* **Headshot Generator**, **Train my AI Model**, and **Interior & Exterior Design** open [Headshots](/docs/ai-images/headshots), [AI Photo Studio](/docs/ai-images/photo-studio), and [Interior Designer](/docs/ai-images/interior-designer).
Step by step, with examples.
Prices for every model.