> ## Documentation Index
> Fetch the complete documentation index at: https://easy-peasy.ai/docs/llms.txt
> Use this file to discover all available pages before exploring further.
# Generate a video
> Describe a scene or animate an image, pick a model, set the length, shape, and quality, and generate a video with sound.
Describe what should happen, and a video model turns it into a clip, usually with sound. You can also start from one of your images and describe how it should move.
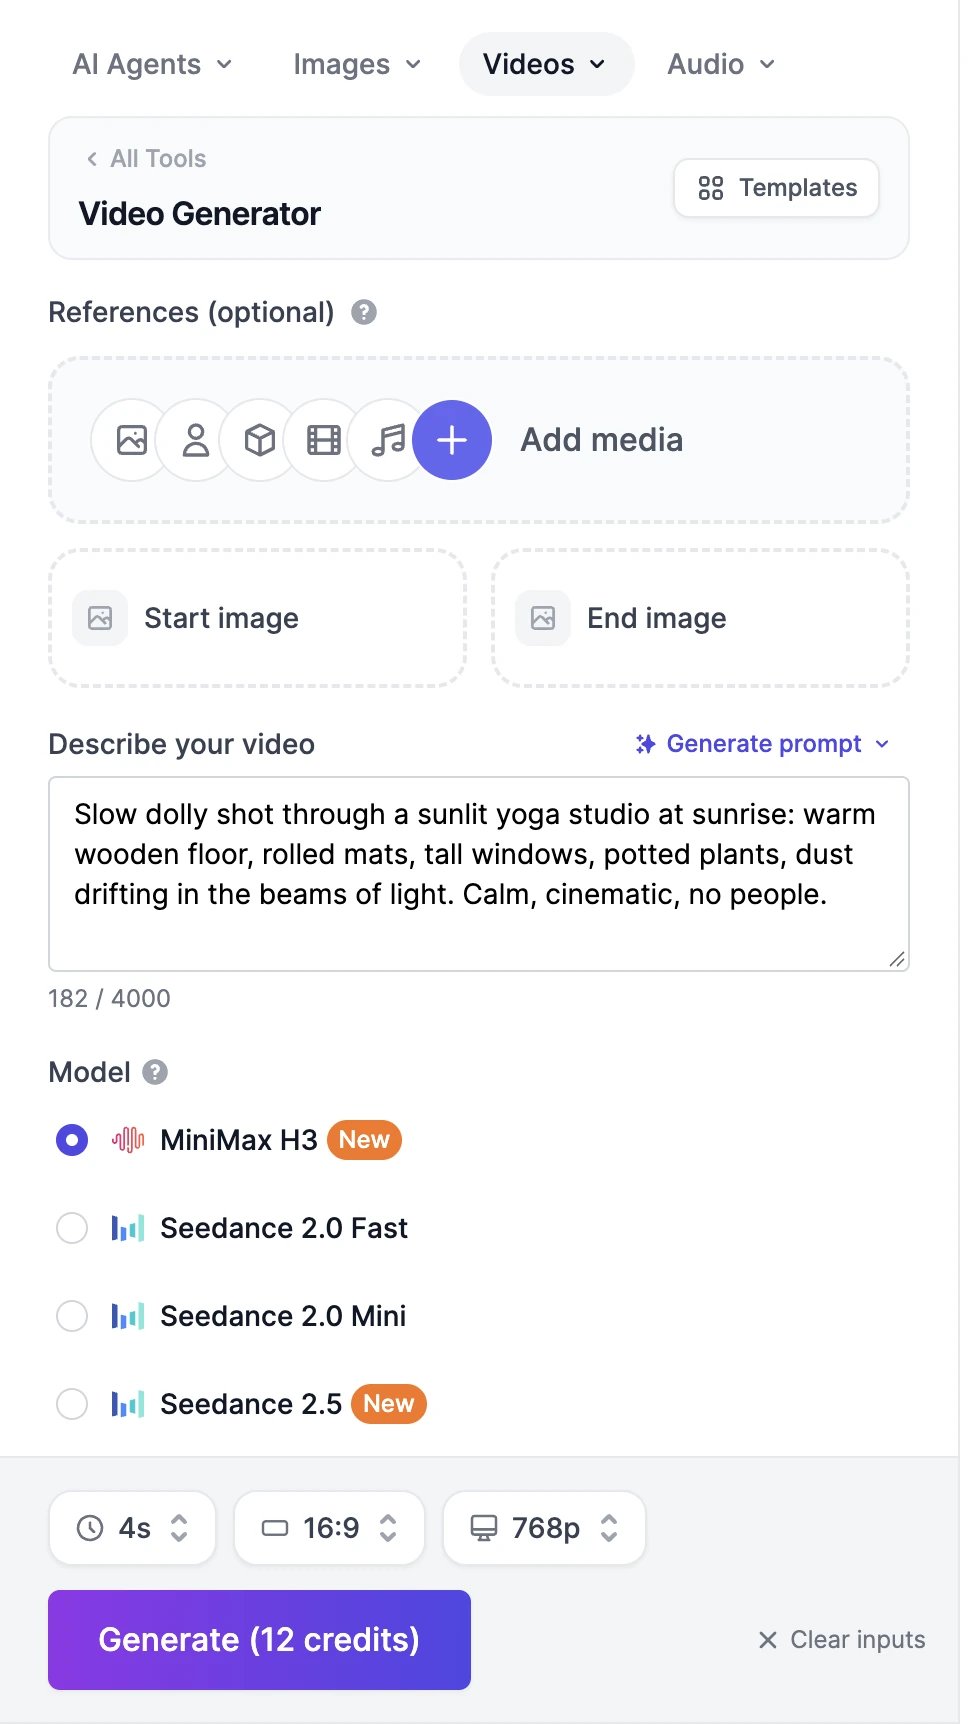 Type what you want to see in **Describe your video**: the subject, what happens, the setting, the light, and how the camera moves. For example: "Slow dolly shot through a sunlit yoga studio at sunrise: warm wooden floor, rolled mats, tall windows, potted plants, dust drifting in the beams of light. Calm, cinematic, no people."
The counter under the box shows how long your prompt can be for the selected model: 4,000 characters for MiniMax H3, and up to 20,000 for Seedance 2.5 and WAN 3.0.
Need help with the wording? **Generate prompt** has two options. **Simple** writes a prompt for you, or a random one when the box is empty. **Advanced** asks about the concept, style, camera, pacing, and effects first. Both use a few words from your plan.
Click **Start image** to animate one of your images. The label above the prompt changes to **How do you want to animate this image?**, so describe the motion rather than the picture. Add an **End image** too, and the video moves from the first image to the last.
Images must be at least 512 × 512 pixels. You can pick an upload or any image from your **History**, so you can make the perfect first frame in [AI Images](/docs/ai-images/generate) and animate it here.
To keep a person or product the same without fixing the first frame, use [references](/docs/videos/references) instead. A video can have a start image or references, not both.
The list under **Model** shows the models that fit what you've added: text models when there's no image, image models when there's a start image, and models that support a start and end image when you add both. If your model can't take what you added, the page switches to one that can, so check the model before you generate.
**MiniMax H3** is selected on paid plans. Prices aren't shown in the list, but the **Generate** button updates as you switch. See [Video models and credits](/docs/videos/models) to compare them.
The bar at the bottom holds the settings for the selected model:
Type what you want to see in **Describe your video**: the subject, what happens, the setting, the light, and how the camera moves. For example: "Slow dolly shot through a sunlit yoga studio at sunrise: warm wooden floor, rolled mats, tall windows, potted plants, dust drifting in the beams of light. Calm, cinematic, no people."
The counter under the box shows how long your prompt can be for the selected model: 4,000 characters for MiniMax H3, and up to 20,000 for Seedance 2.5 and WAN 3.0.
Need help with the wording? **Generate prompt** has two options. **Simple** writes a prompt for you, or a random one when the box is empty. **Advanced** asks about the concept, style, camera, pacing, and effects first. Both use a few words from your plan.
Click **Start image** to animate one of your images. The label above the prompt changes to **How do you want to animate this image?**, so describe the motion rather than the picture. Add an **End image** too, and the video moves from the first image to the last.
Images must be at least 512 × 512 pixels. You can pick an upload or any image from your **History**, so you can make the perfect first frame in [AI Images](/docs/ai-images/generate) and animate it here.
To keep a person or product the same without fixing the first frame, use [references](/docs/videos/references) instead. A video can have a start image or references, not both.
The list under **Model** shows the models that fit what you've added: text models when there's no image, image models when there's a start image, and models that support a start and end image when you add both. If your model can't take what you added, the page switches to one that can, so check the model before you generate.
**MiniMax H3** is selected on paid plans. Prices aren't shown in the list, but the **Generate** button updates as you switch. See [Video models and credits](/docs/videos/models) to compare them.
The bar at the bottom holds the settings for the selected model:
 | Setting | What it does |
| ------------ | ------------------------------------------------------------------------------------------------------------------------------------------------------------------------------------------------------------------------------------------------ |
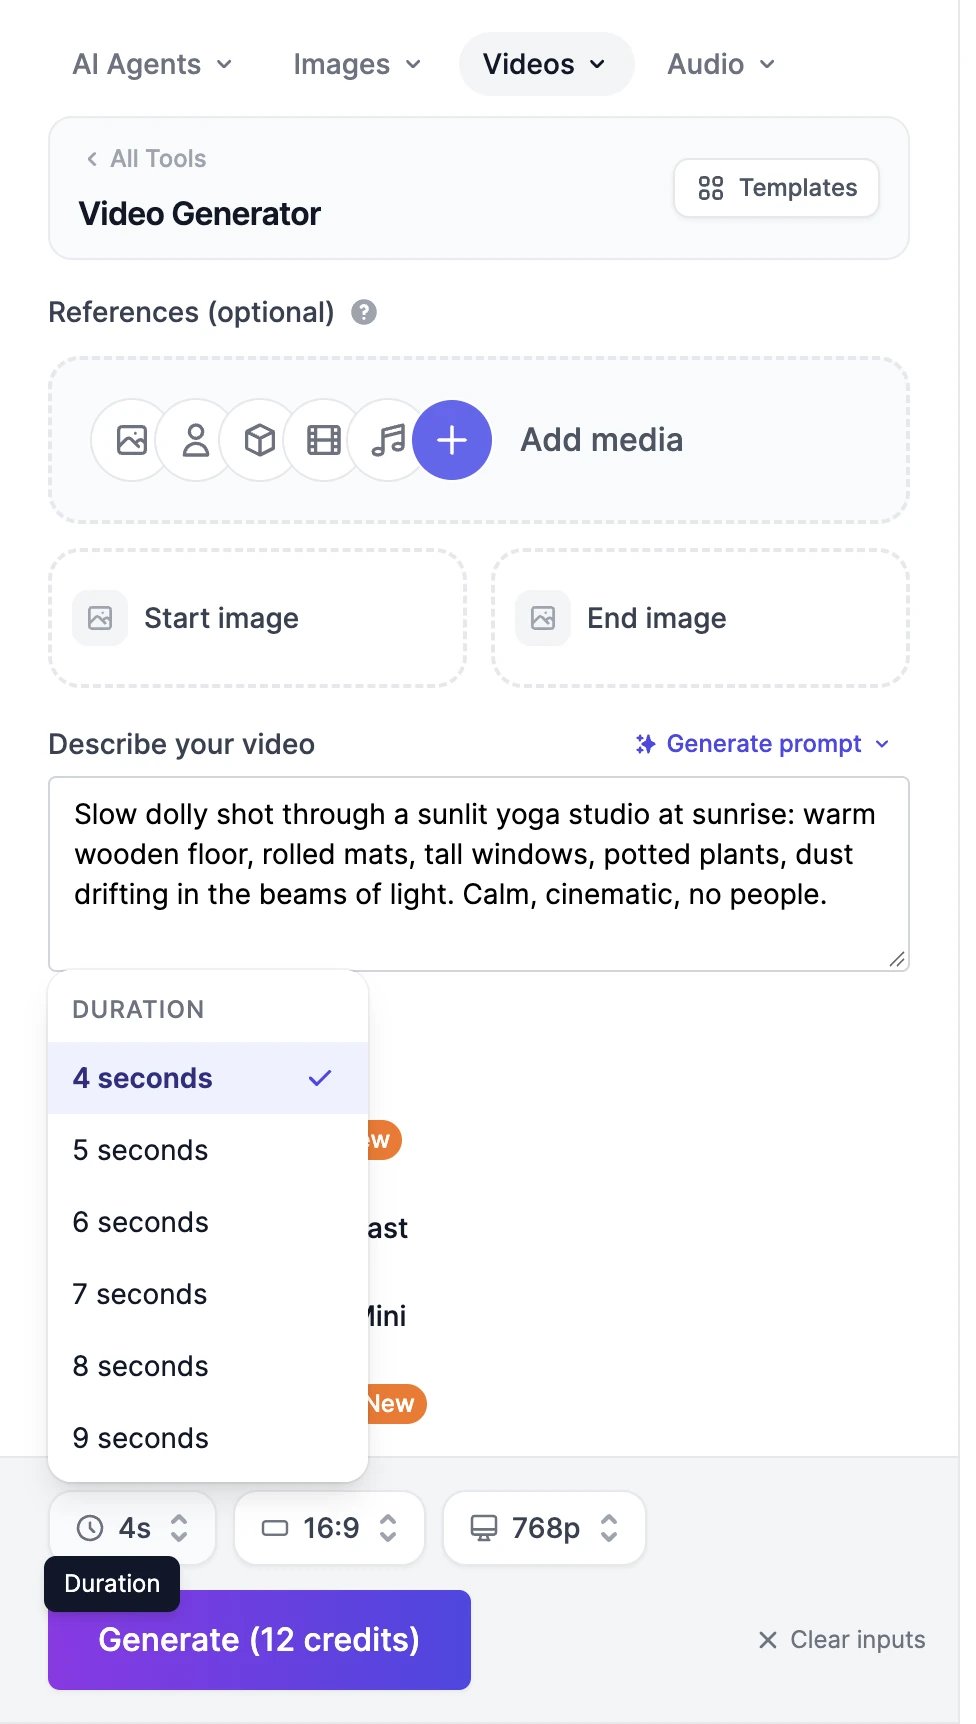
| Duration | The length in seconds. Each model offers its own lengths, from 3 seconds up to 30 with Seedance 2.5 and WAN 3.0. |
| Aspect ratio | The shape, such as **16:9** for YouTube or **9:16** for Reels and TikTok. Shown only when the model offers more than one. Image models usually follow the shape of your start image. |
| Resolution | The quality, such as **480p**, **720p**, **1080p**, **2K**, or **4K**. Higher resolutions cost more. |
| **Audio** | Turns the soundtrack on or off. On Veo 3.1, Veo 3.1 Fast, Kling 3.0, Kling O3, and Seedance 1.5 Pro, a silent video costs less, and the switch shows the discount. MiniMax H3 and Gemini Omni Flash 1.1 always add sound, so they don't show it. |
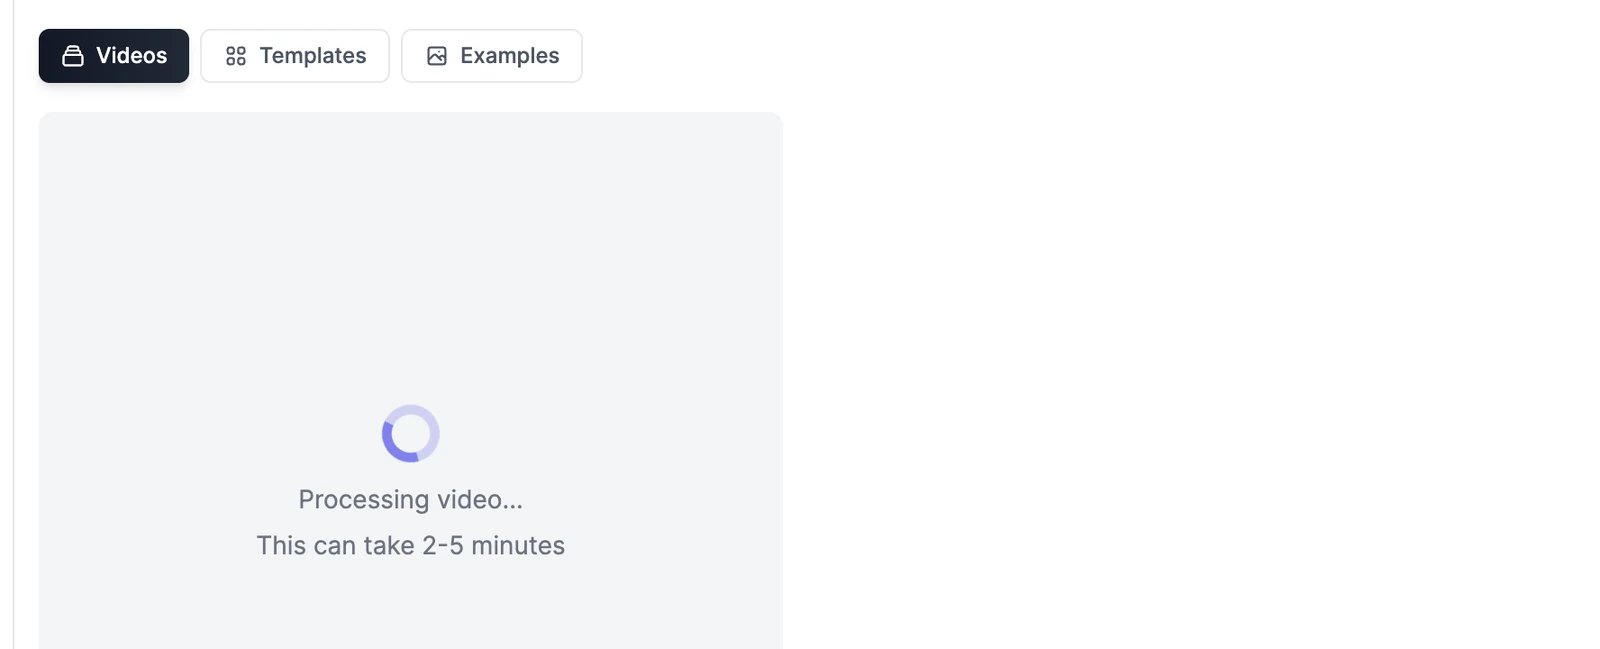
The button shows the total, for example **Generate (12 credits)**. Your video appears in the **Videos** tab as **Processing video...** and is usually ready in 2 to 5 minutes. The list updates by itself. You can leave the page: the video keeps rendering and appears in **History** > **Videos** when it's done.
| Setting | What it does |
| ------------ | ------------------------------------------------------------------------------------------------------------------------------------------------------------------------------------------------------------------------------------------------ |
| Duration | The length in seconds. Each model offers its own lengths, from 3 seconds up to 30 with Seedance 2.5 and WAN 3.0. |
| Aspect ratio | The shape, such as **16:9** for YouTube or **9:16** for Reels and TikTok. Shown only when the model offers more than one. Image models usually follow the shape of your start image. |
| Resolution | The quality, such as **480p**, **720p**, **1080p**, **2K**, or **4K**. Higher resolutions cost more. |
| **Audio** | Turns the soundtrack on or off. On Veo 3.1, Veo 3.1 Fast, Kling 3.0, Kling O3, and Seedance 1.5 Pro, a silent video costs less, and the switch shows the discount. MiniMax H3 and Gemini Omni Flash 1.1 always add sound, so they don't show it. |
The button shows the total, for example **Generate (12 credits)**. Your video appears in the **Videos** tab as **Processing video...** and is usually ready in 2 to 5 minutes. The list updates by itself. You can leave the page: the video keeps rendering and appears in **History** > **Videos** when it's done.
 **Clear inputs** empties the prompt, images, references, and scene settings. It keeps the model, length, and aspect ratio.
## Add camera, lighting, and shot directions
Click **Add media** and use the **Scene** tabs, **Camera**, **Lighting**, and **Shot Type**, to add ready-made directions such as a lens, **Golden Hour** light, or a **Low Angle** shot. They're added to the end of your prompt when you generate. They work the same way as in [AI Images](/docs/ai-images/generate).
## Tips for better videos
* Describe one continuous shot: who or what is in it, what happens, how the camera moves, and the light.
* Say what should be heard. Models that make sound follow directions such as "soft piano music", "birds outside", or dialogue in quotes.
* For full control of the look, make the first frame in AI Images, then use it as the **Start image**.
* Test cheaply first: 4 seconds at 480p on Seedance 2.0 Mini costs 8 credits. Switch to a stronger model or a higher resolution once the idea works.
* To keep the same character across several videos, add them as a [reference](/docs/videos/references) every time.
## On the Free plan
* You can use **Seedance 2.0 Mini** (480p, up to 5 seconds), and **Veo 3.1 Fast** and **Veo 3.1 Lite** (720p). Other models show a crown and can't be selected.
* Videos use the same credits as images, and the shortest video costs 8 credits, so you may need [bonus credits](/docs/account/buy-credits) or an upgrade to make one.
* Extending, editing, and upscaling videos, and Motion Control, need a paid plan.
## If a video fails
* A tile that says **Generation Failed** doesn't cost anything. The video was refused, usually because of the prompt or an image, or the model couldn't finish it. Try again with a different prompt or another model.
* Sometimes a failed video disappears from the list instead. Its credits are returned too.
* Images you add are checked when you add them. If one breaks the content policy, it's marked **Blocked** and the button changes to **Content Blocked**. Remove it to continue.
Keep a character or product the same across videos.
Download, share, extend, or edit your results.
**Clear inputs** empties the prompt, images, references, and scene settings. It keeps the model, length, and aspect ratio.
## Add camera, lighting, and shot directions
Click **Add media** and use the **Scene** tabs, **Camera**, **Lighting**, and **Shot Type**, to add ready-made directions such as a lens, **Golden Hour** light, or a **Low Angle** shot. They're added to the end of your prompt when you generate. They work the same way as in [AI Images](/docs/ai-images/generate).
## Tips for better videos
* Describe one continuous shot: who or what is in it, what happens, how the camera moves, and the light.
* Say what should be heard. Models that make sound follow directions such as "soft piano music", "birds outside", or dialogue in quotes.
* For full control of the look, make the first frame in AI Images, then use it as the **Start image**.
* Test cheaply first: 4 seconds at 480p on Seedance 2.0 Mini costs 8 credits. Switch to a stronger model or a higher resolution once the idea works.
* To keep the same character across several videos, add them as a [reference](/docs/videos/references) every time.
## On the Free plan
* You can use **Seedance 2.0 Mini** (480p, up to 5 seconds), and **Veo 3.1 Fast** and **Veo 3.1 Lite** (720p). Other models show a crown and can't be selected.
* Videos use the same credits as images, and the shortest video costs 8 credits, so you may need [bonus credits](/docs/account/buy-credits) or an upgrade to make one.
* Extending, editing, and upscaling videos, and Motion Control, need a paid plan.
## If a video fails
* A tile that says **Generation Failed** doesn't cost anything. The video was refused, usually because of the prompt or an image, or the model couldn't finish it. Try again with a different prompt or another model.
* Sometimes a failed video disappears from the list instead. Its credits are returned too.
* Images you add are checked when you add them. If one breaks the content policy, it's marked **Blocked** and the button changes to **Content Blocked**. Remove it to continue.
Keep a character or product the same across videos.
Download, share, extend, or edit your results.