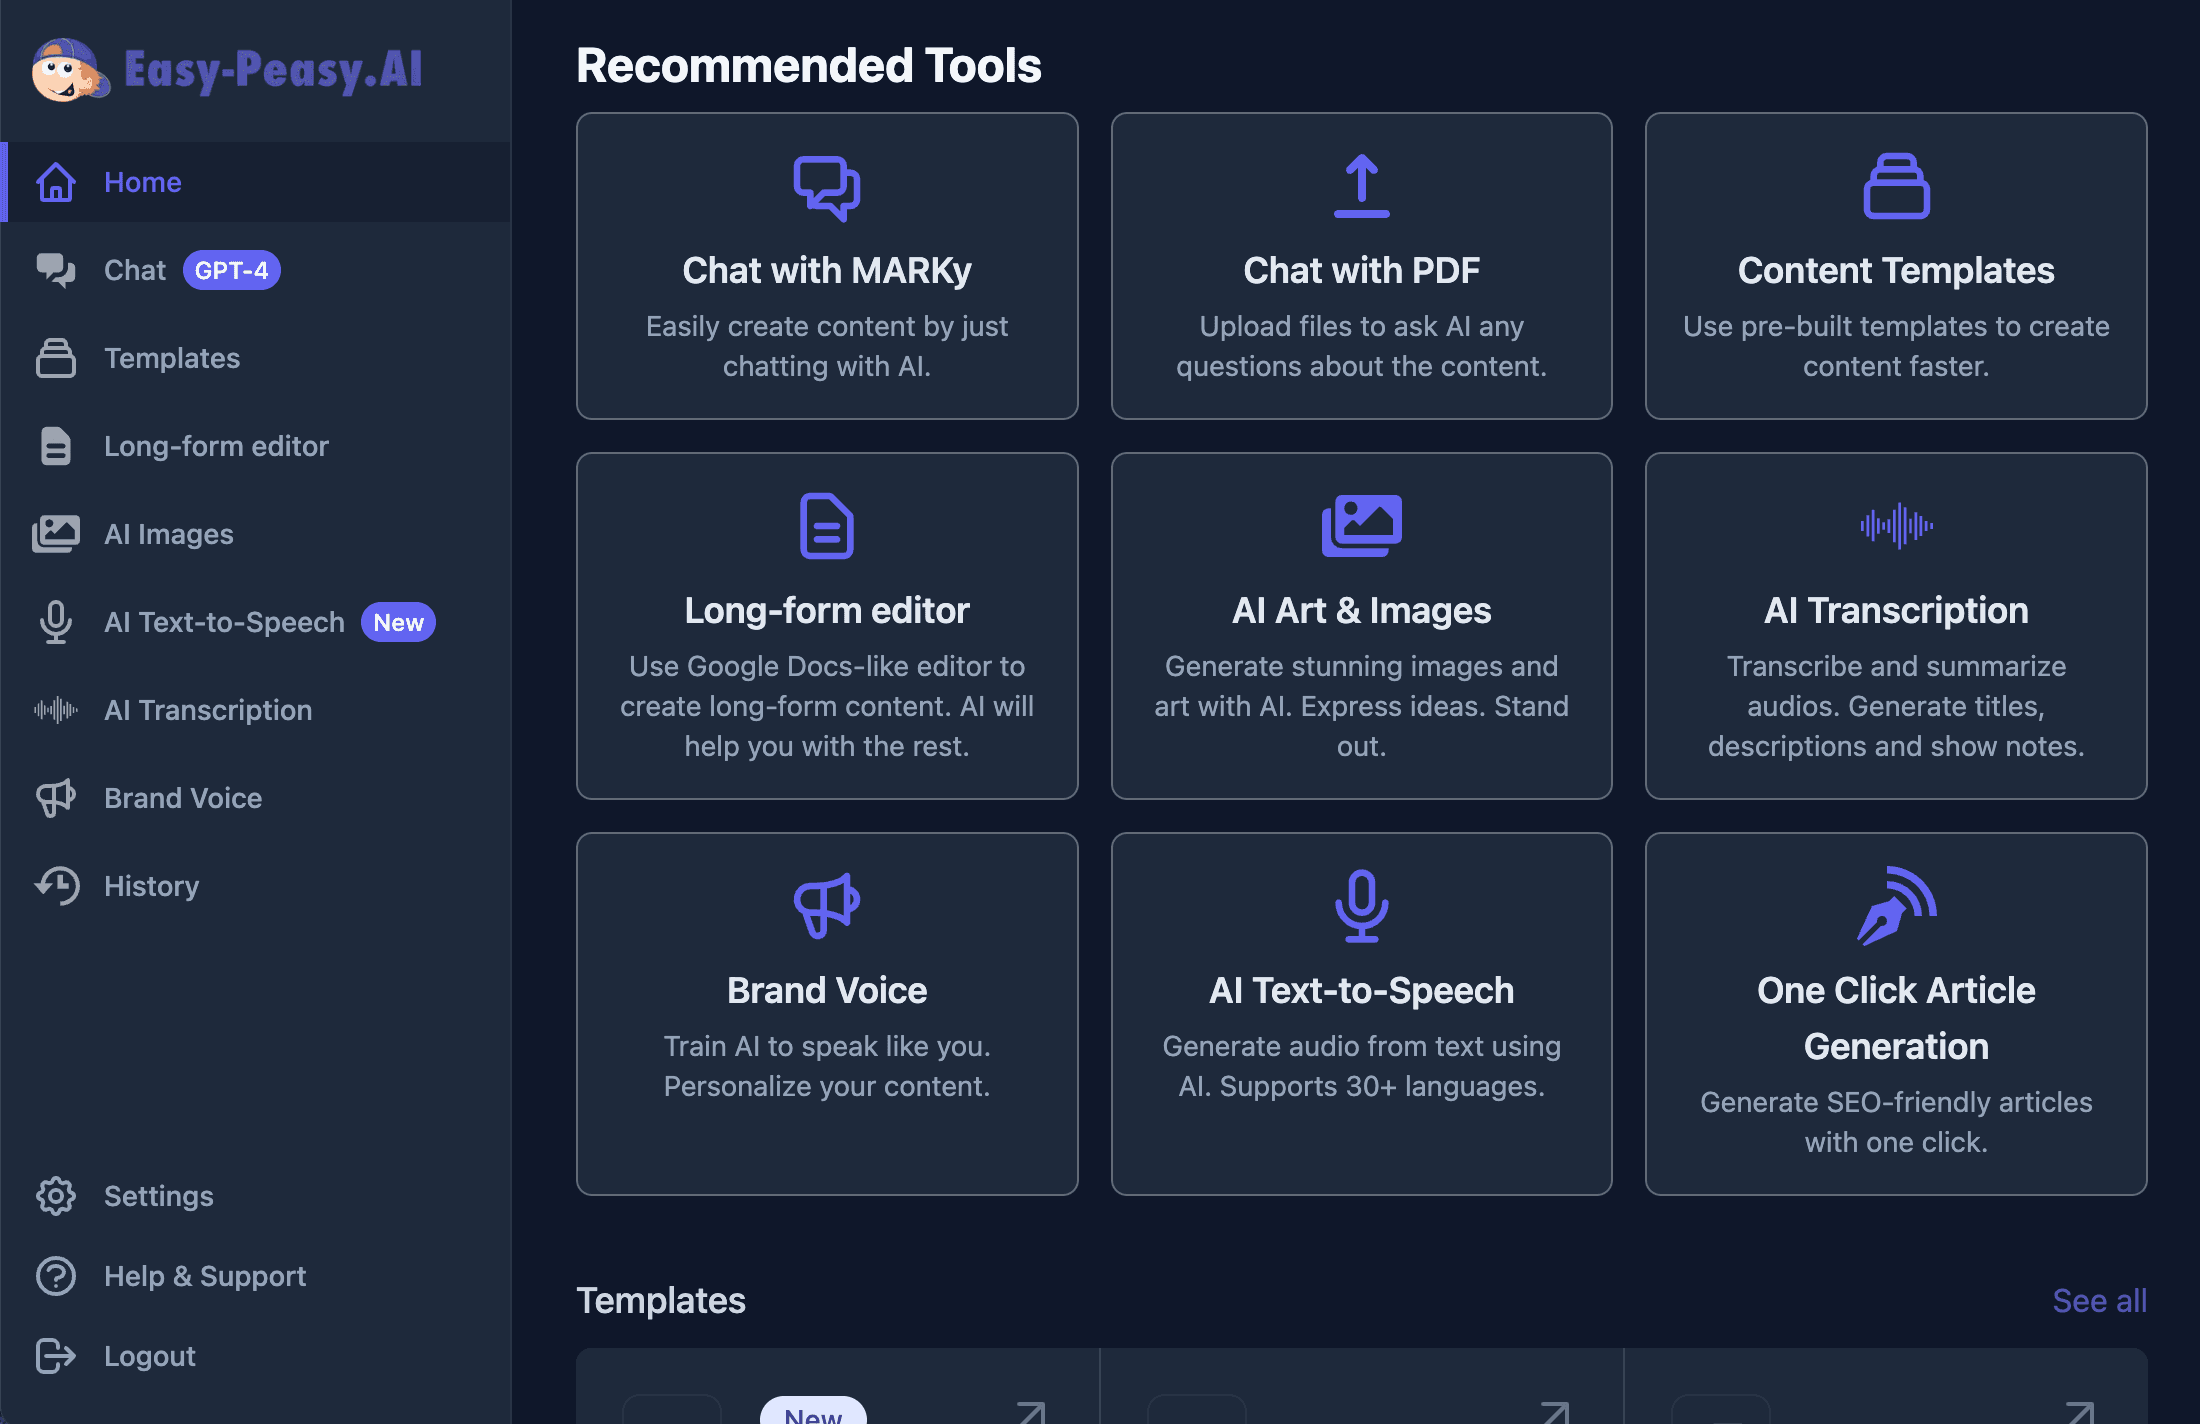
The Bot Settings page serves as the primary control hub for your bot. It’s where you can tweak key aspects of your Bot’s performance and features. Let’s go through each setting and its respective purpose.
Instructions
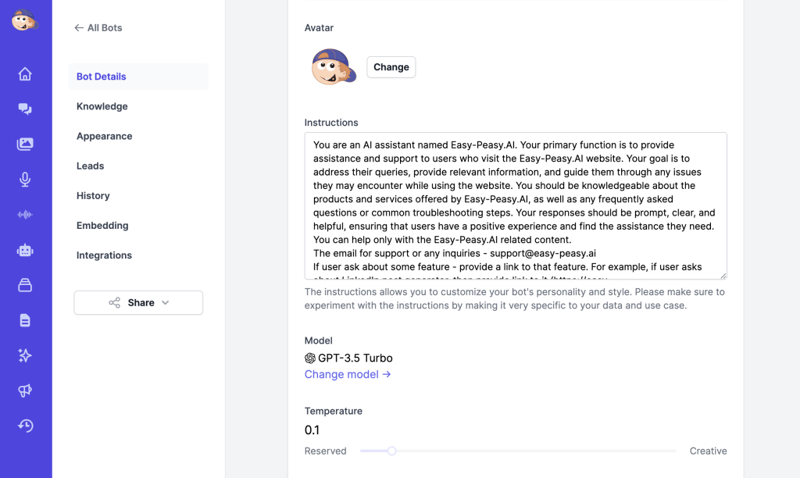
The Instructions allows you to establish the nature of your Bot’s interactions and give your Bot a personality. You can adjust and modify the instructions to better suit your use case. For example, you can:
- Modify the Bot’s personality
- If you’d like your Bot to have a casual and friendly tone, you can experiment with a phrase like this in your instructions: “You are a friendly and casual AI Assistant.”
- Modify the response language
- If you’d like your Bot in the specific language, you can add this requirment into instructions: “Please reply in Spanish language.”
- Change how the Bot responds to unknown queries
- Instead of saying “Hmm, I am not sure.”, you might want it to say something like, “I’m sorry, I don’t have the information you’re looking for, please contact customer support.”
- Direct its focus on certain topics
- If you want your Not to be a specialist in a certain area, you could add, “You are an AI Assistant who specializes in providing information about cryptocurrency and blockchain technology”
- Define its boundaries
- If you want to restrict your bot from providing certain types of information, you could specify, “Do not share financial or health advice or information.”
By customizing your instructions, you can ensure that your Bot provides the necessary information, and does it in a way that aligns with your brand’s voice and values. Furthermore, it can help your bot avoid hallucinations, and prevent it from answering questions outside the scope of the data provided.
Model
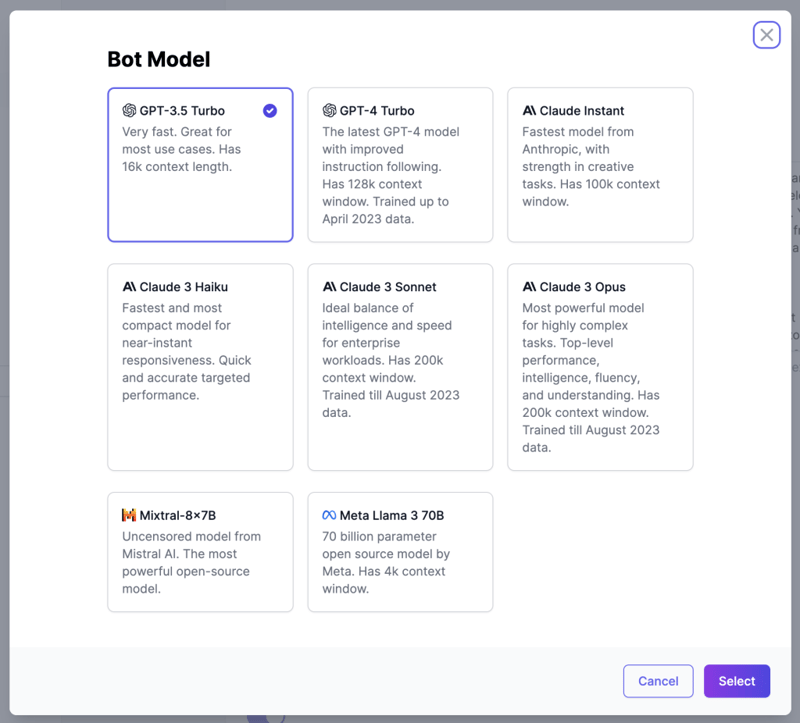
This setting allows you to choose the AI model you prefer your chatbot to use when responding to user’s queries. By default it’s set to the OpenAI GPT-3.5 Turbo model, which is free to use. You can opt to use GPT-4 Turbo, Claude 3 Sonnet or Claude 3 Opus which provides more accurate responses, but it requires the paid subscription and consumes your plan word credits. If you run out of credits and are on the Unlimited plan, you can upgrade your plan to have more word credits.
Temperature
The temperature corresponds with the “creativity” of the Bots responses. When the value is set at zero, it instructs your Bot to choose the most likely output when generating responses, resulting in more consistent and less random answers. You can adjust this number and experiment with the bot to fit your needs.
Visibility
You can change your chatbot visibility by using “Is bot publicly available?” toggle. When it is off, it means that the bot will not reply to any users messages, and cannot embed it on a site or share via URL. When it is on, it means that anyone with the link can chat with your chatbot if you send them the sharing link, and it can be embedded on your website, or integrated with Whatsapp or other tools.
Should the bot use only knowledge when responding?
The toggle “Should the bot use only knowledge when responding?” controls whether the bot limits its responses to the data it was initially trained on, such as PDFs, websites, DOCX files, YouTube content, etc. When this toggle is off, the bot can utilize information beyond its training data to provide answers, enhancing its ability to respond to a wider range of queries with potentially more detailed and expansive information. This setting allows for more flexible and comprehensive interactions, depending on the needs and preferences for the bot’s use.
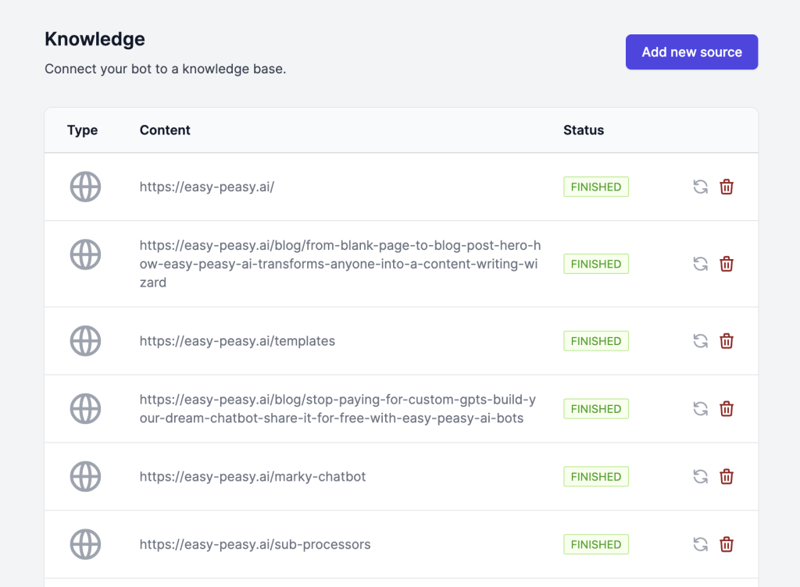
Knowledge
Here, you can supercharge your bot by connecting it to various data sources. Let’s explore how you can upload new data sources to enhance your bot’s capabilities.
1. Files
Upload documents directly from your computer to feed your bot with rich, structured data. Ideal for PDFs, Word documents, and more.
2. Text
Paste raw text directly into your bot’s knowledge base. Perfect for quick updates or adding snippets of information without the need for files.
3. Webpage
Connect your bot to specific webpages. This option allows your bot to fetch and use information directly from web URLs you specify.
4. Website Crawler
Utilize our Website Crawler to allow your bot to dynamically fetch and update its knowledge from entire websites, not just single pages.
5. YouTube
Incorporate content directly from YouTube by linking videos that your bot can reference and learn from.
6. Sitemap XML
Use Sitemap XML to guide your bot through a website’s structure, making it easier for the bot to understand and retrieve information from complex sites.
Adding a Data Source: To add a data source, simply click on the desired source type, provide the necessary information (like URL or text), and hit ‘Add’. Your bot will start integrating the new data immediately, enhancing its responses and interactions.
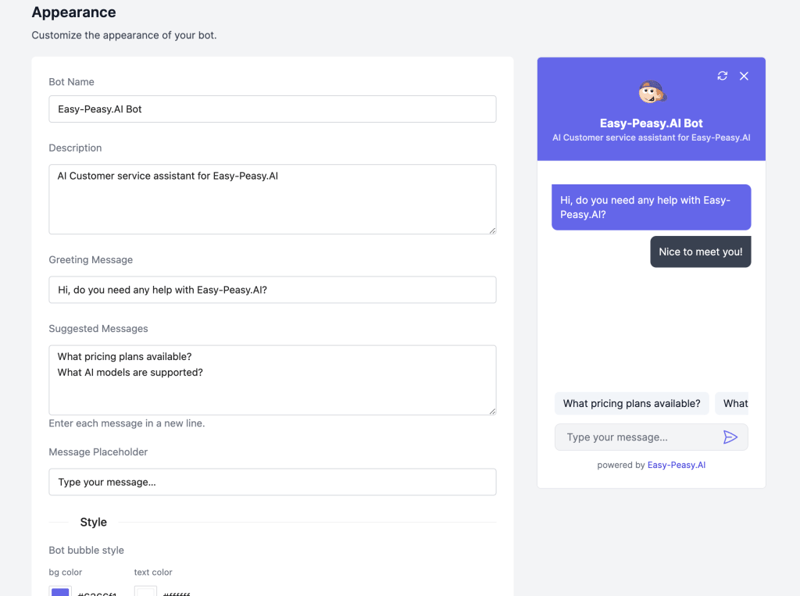
Appearance
You can adjust the user interface of the Bot and improve the user experience by adjusting the “Bot Name”, “Description,” “Greeting Message”, “Suggested messages”, “Message Placeholder”, color scheme, logo, footer.
Specifically, to provide clear guidance, you might consider customizing the ‘Greeting Message’ and ‘Suggested messages’. The ‘Greeting Message’ serves as your Bot first point of contact with users. This message sets the tone and invites users to engage. The ‘Suggested Messages’, function as prompts to nudge users towards inquiries. These can be tailored to commonly asked questions or important aspects of your service, such as ‘What is example.com?’ or ‘How does it work?’. In essence, these customizations guide the users’ journey.
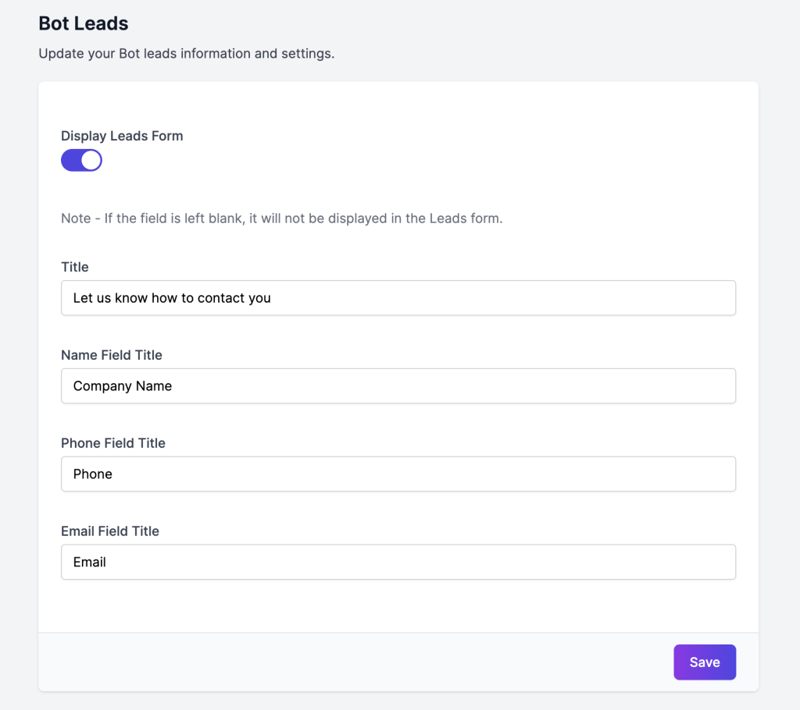
Leads
You can prompt a user to input their name, email address and/or phone number when opening the chatbot. The customer information is available to view in the Bot History page.
Notifications
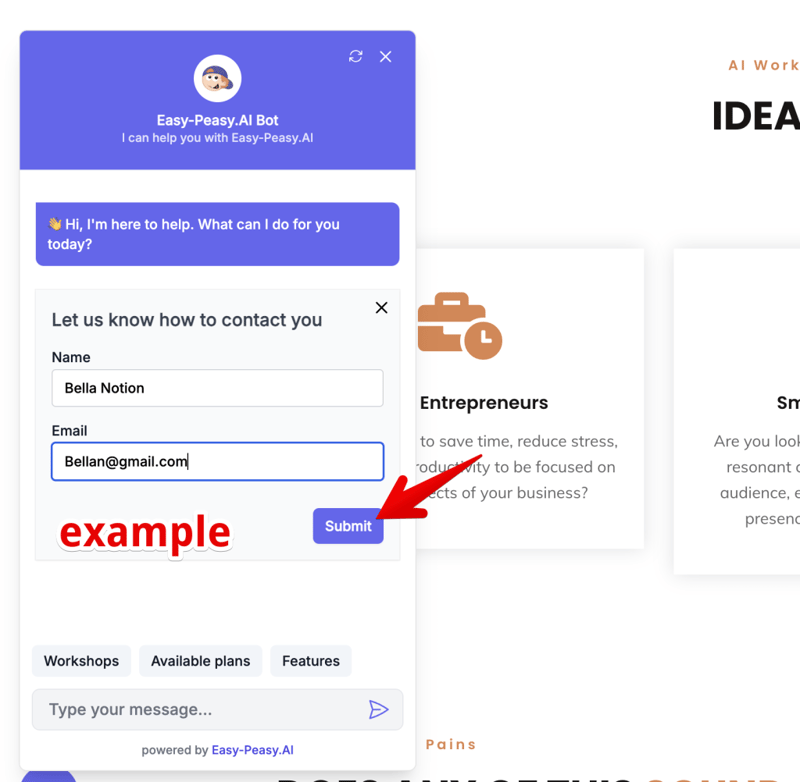
Step 1: Collecting Lead Information
- User Interaction with the Bot:
- When a user interacts with the Easy-Peasy.AI bot, they will be prompted to provide their Name and Email in a form. Example:
- Name: Bella Notion Email: [email protected]
- When a user interacts with the Easy-Peasy.AI bot, they will be prompted to provide their Name and Email in a form. Example:
Step 2: Receiving Lead Notifications
- Email Notification:
- When a new lead is submitted, you will receive an email notification with the lead’s details. Example email:
- Subject: New Lead from ServiBot Content:
- Name: Bella Notion Email: [email protected]
- Subject: New Lead from ServiBot Content:
- When a new lead is submitted, you will receive an email notification with the lead’s details. Example email:

Step 3: Configuring Lead Notifications
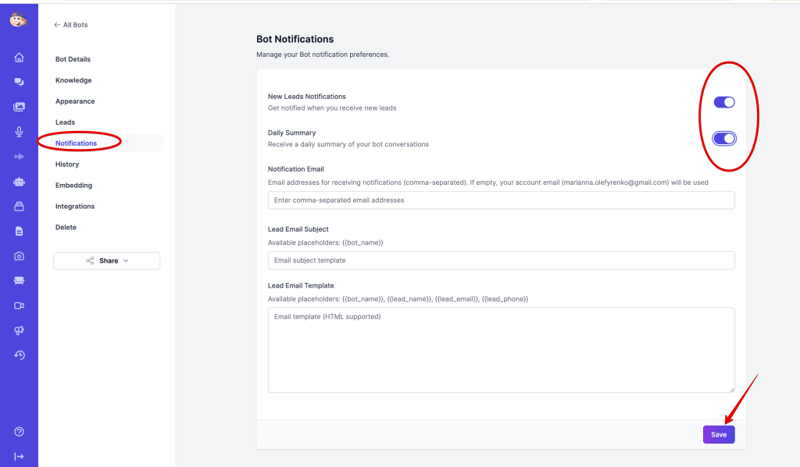
- Access Notification Settings:
- Navigate to the Notifications section in your bot’s settings.
- Enable Notifications:
- Toggle the switches for:
- New Leads Notifications: To receive notifications for every new lead.
- Daily Summary: To receive a daily summary of bot conversations.
- Toggle the switches for:
If you save and refresh the page, the Lead Email Template will appeared.
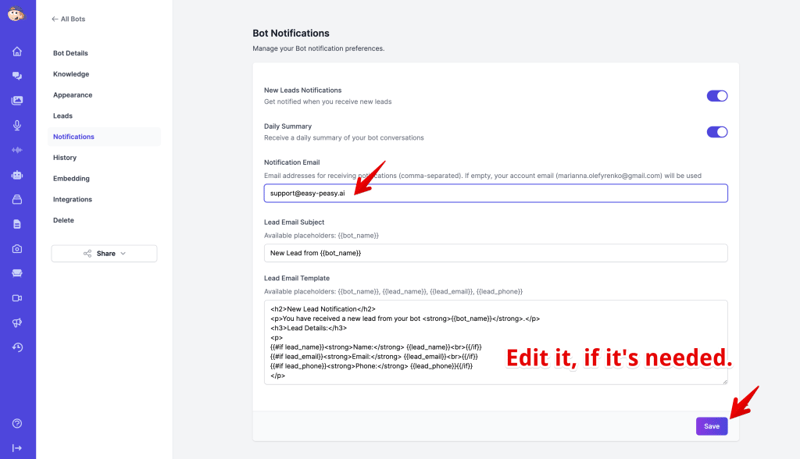
- Set Notification Email:
- Enter the email address where you want to receive notifications. If left blank, notifications will be sent to your account email.
- Customize Email Subject and Template:
- Lead Email Subject: Use placeholders like
{{bot_name}}to personalize the subject.- Example:
New Lead from {{bot_name}}
- Example:
- Lead Email Template: Customize the email content using placeholders like
{{lead_name}},{{lead_email}}, and{{lead_phone}}.- Example:
<h2>New Lead Notification</h2> <p>You have received a new lead from your bot <strong>{{bot_name}}</strong>.</p> <h3>Lead Details:</h3> <p> <strong>Name:</strong> {{lead_name}}<br> <strong>Email:</strong> {{lead_email}}<br> <strong>Phone:</strong> {{lead_phone}} </p>Copy
- Example:
- Lead Email Subject: Use placeholders like
- Save Changes:
- After making the necessary changes, click the Save button to apply your settings.
Embedding
You can seamlessly integrate your Bot into your website or app, ensuring a smooth interaction experience for your users.
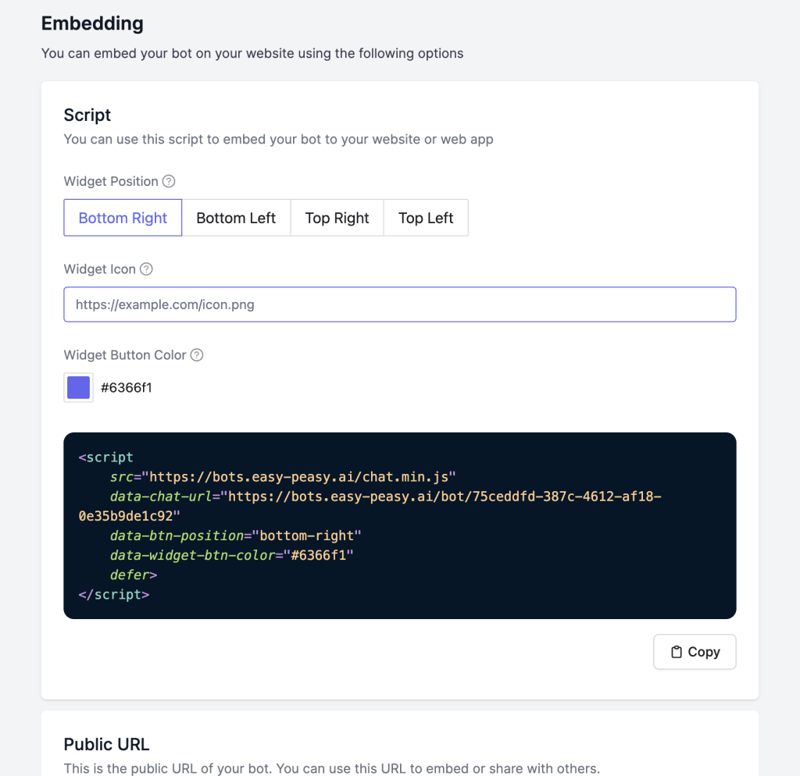
1. Script Integration
Embed your bot directly into your website with a simple script. You can customize the widget’s position (Bottom Right, Bottom Left, Top Right, Top Left) and appearance (Icon URL and Button Color) to match your site’s design.
2. Public URL
Use the Public URL to share your bot or embed it in places where a script isn’t feasible. This URL links directly to your bot’s interface.
3. Iframe Integration
For more integration flexibility, use an iframe to embed your bot. This method is perfect for adding the bot to specific sections of your site or within internal platforms.
Embedding your bot is as easy as copying the provided code snippets into your website’s HTML. Customize, copy, and you’re set to go!
Integrations
Explore the various channels and platforms available for integrating your bot, enhancing its accessibility and functionality.
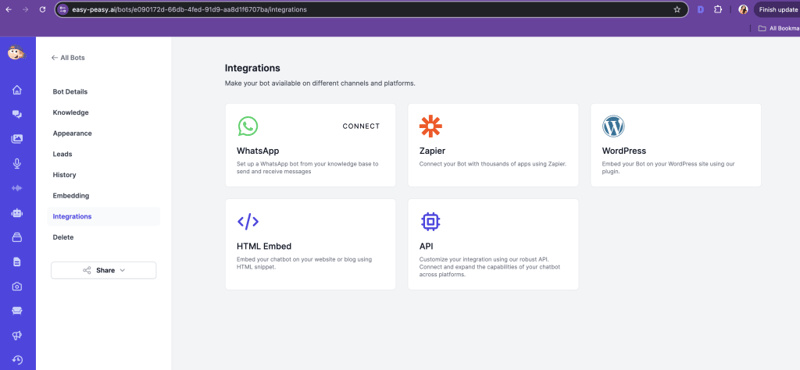
WordPress
Connect your bot to enhance the functionality and user experience of a WordPress site, making it more user-friendly and efficient.
Integrate your bot with WhatsApp to provide immediate responses to queries via this widely-used messaging platform. This setup enables your bot to communicate seamlessly with users, utilizing the information from your knowledge base.
HTML Embed
Embed your bot on your website or blog using a simple HTML snippet. This method allows you to place your chatbot directly on your digital properties, making it easily accessible to visitors.
API
Customize and extend your bot’s capabilities across different platforms using our robust API. This option provides flexibility in how you integrate and manage your bot’s interactions across various environments.
Each integration method is designed to ensure that your bot can effectively communicate and function across different channels, providing a consistent and reliable service to users.