Welcome to our comprehensive tutorial on creating a custom AI bot using Easy-Peasy.AI. Follow these steps to set up, customize, and integrate your bot seamlessly.
Let’s dive right in!
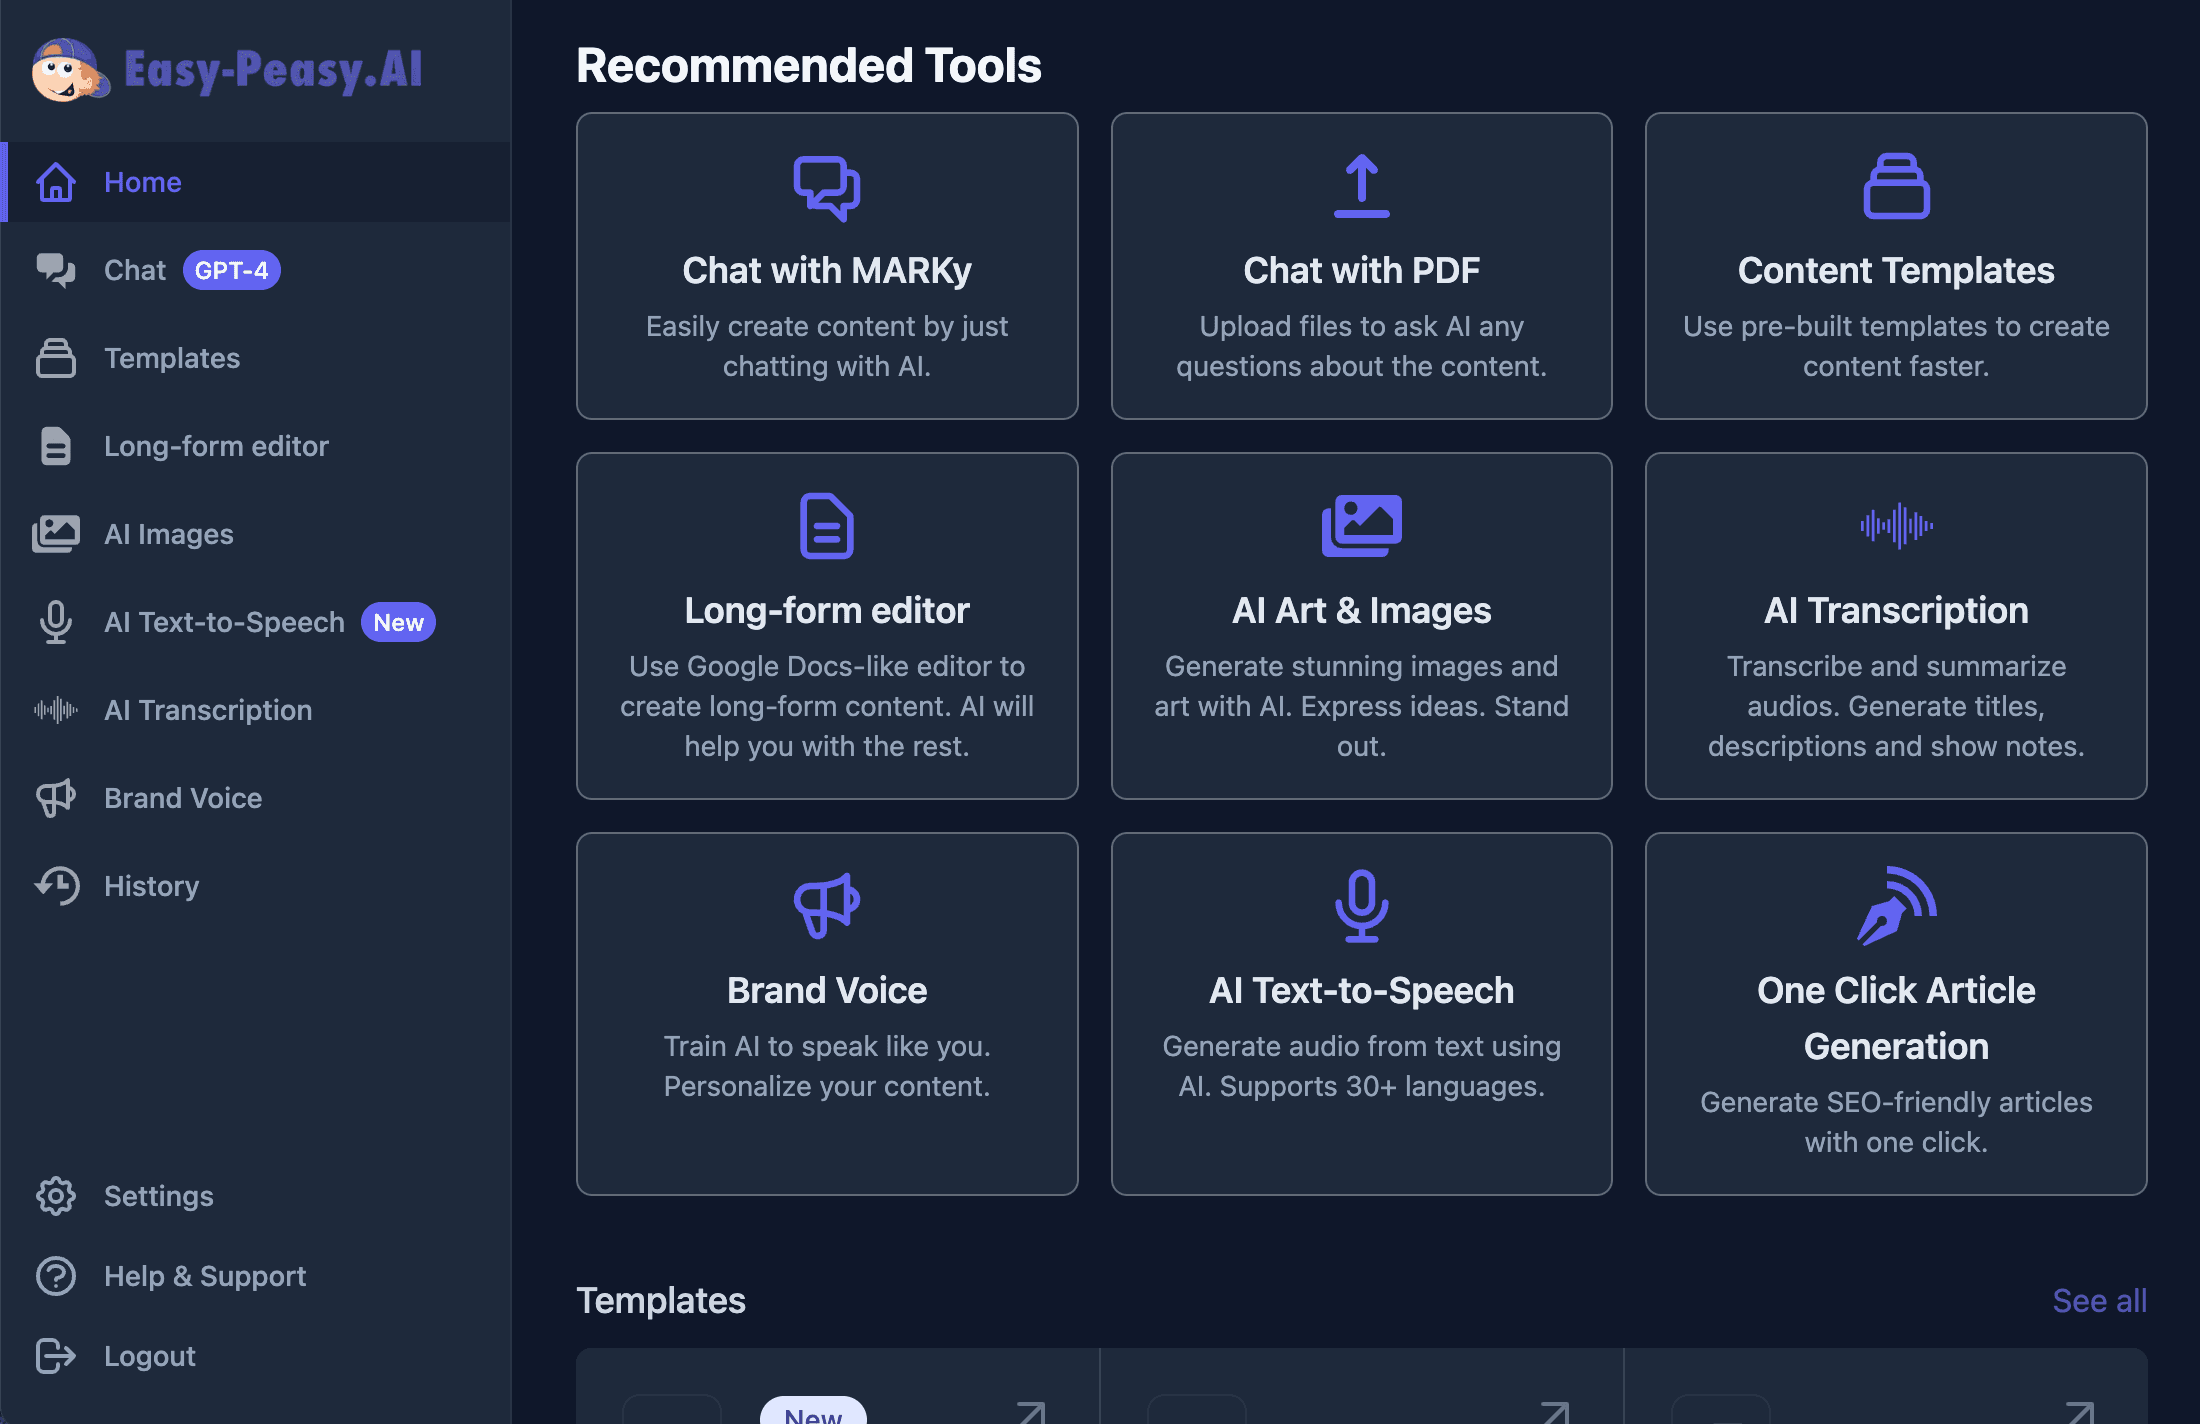
Step-by-Step Tutorial
1. Accessing the Dashboard
- Navigate to Your Dashboard
- Click on “Bots” from the main menu.
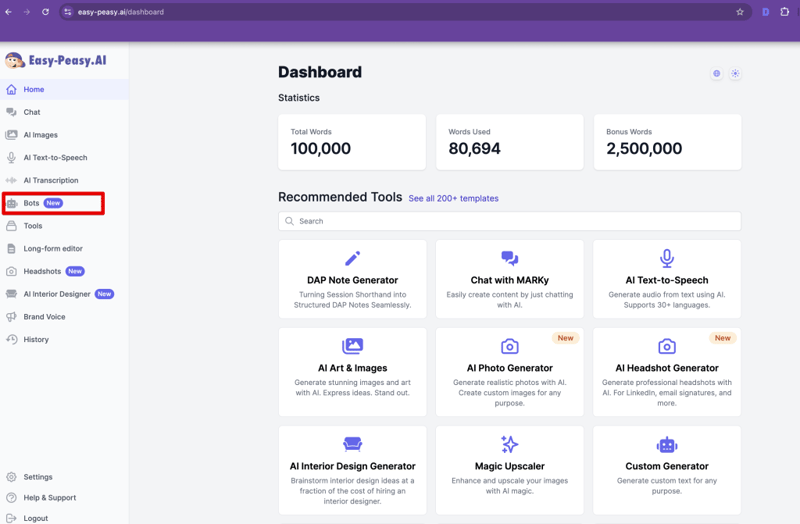
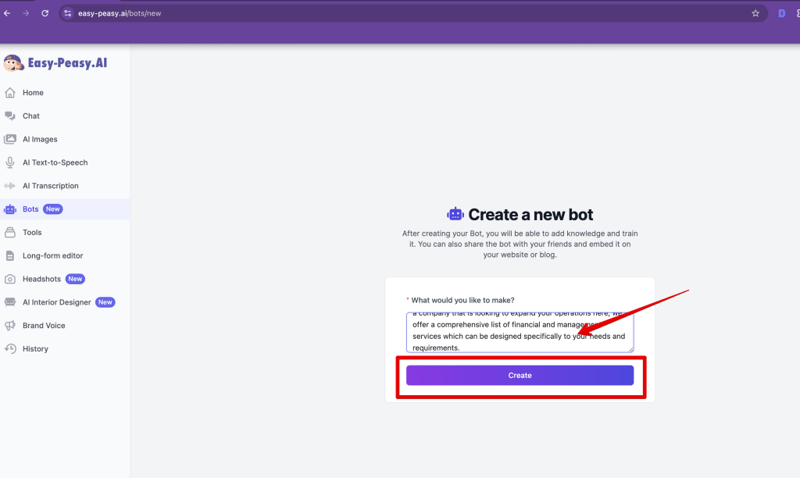
2. Creating a New Bot
- Click the “Create a Bot” button in the top right corner.
- Add Bot Description.
- Click “Create”.

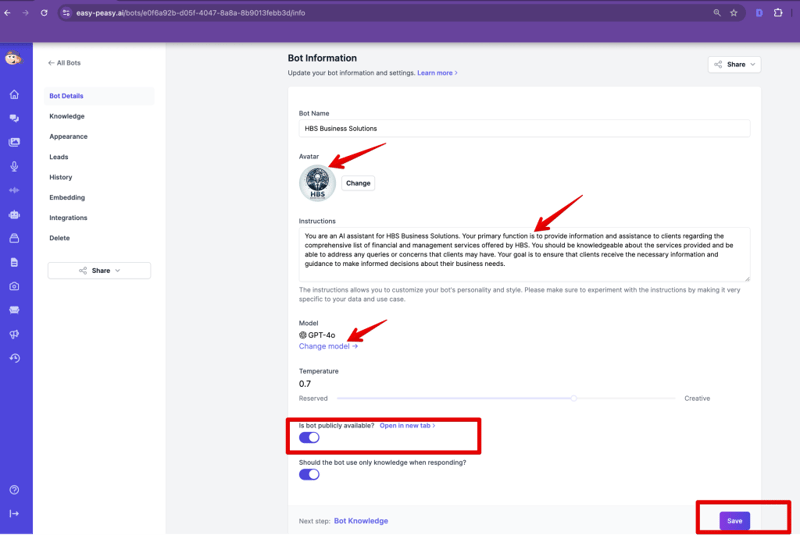
3. Customizing Your Bot
- Review System-Generated Details
- Choose a Module
- Select your preferred module (e.g., GPT-4o).
- Public Availability
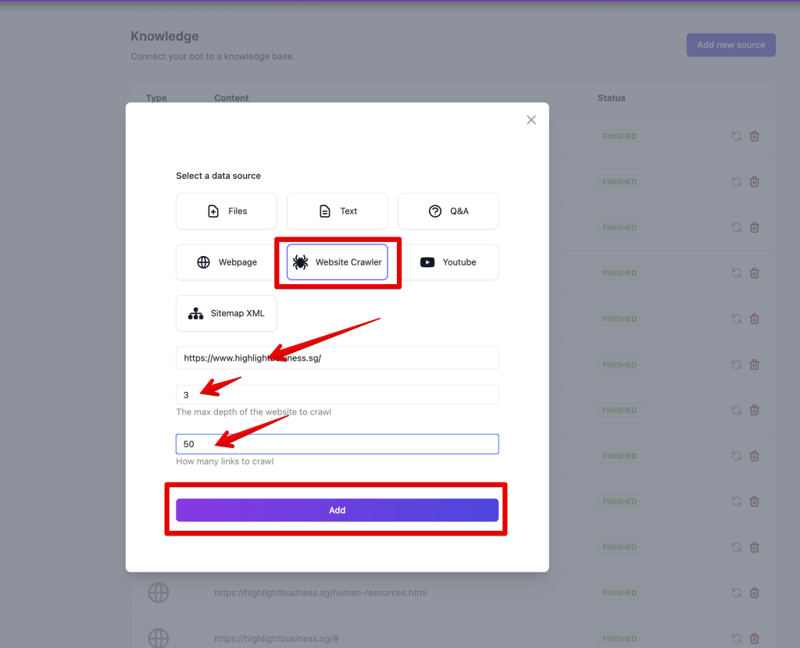
4. Setting Up the Knowledge Base
- Navigate to Knowledge Base.
- Input specific URLs or documents to enhance your bot’s responses.
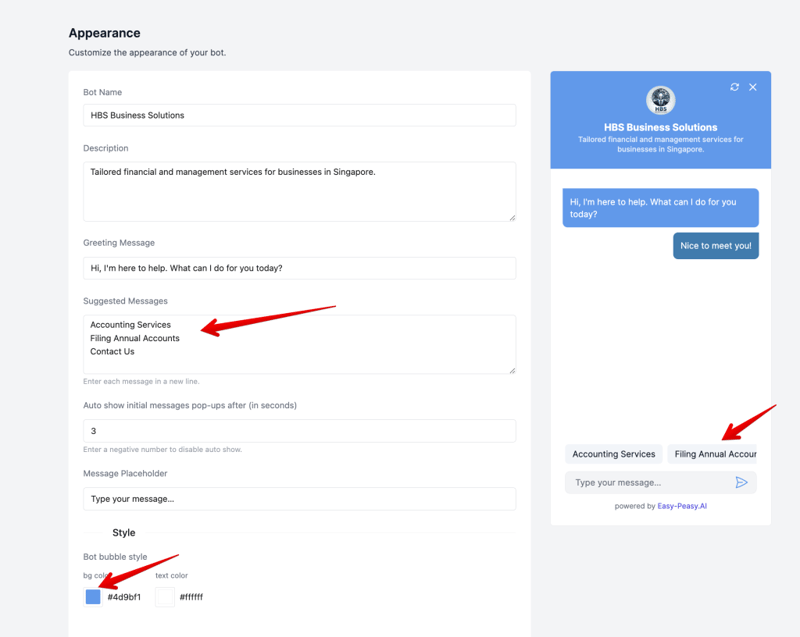
5. Customizing Appearance
- Modify Appearance Details: Adjust avatar, theme color, and fonts to fit your brand.
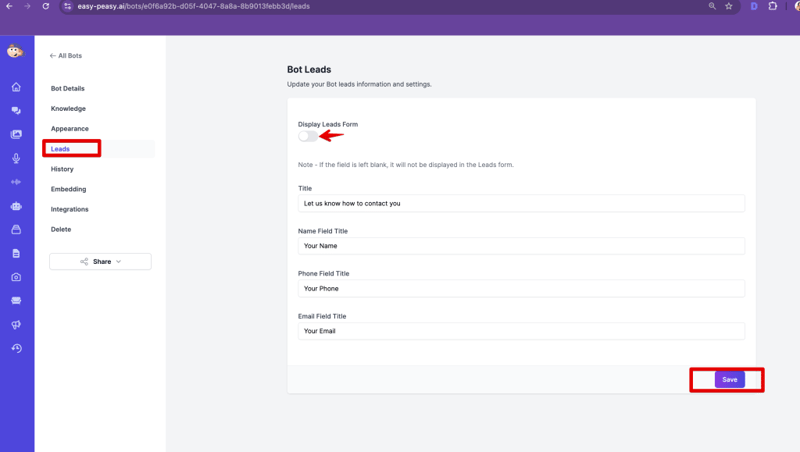
6.Managing Leads
- Configure Lead Collection: Enable lead collection to gather user info for marketing.
7. Tracking Interaction History
- Track user interactions to improve responses.

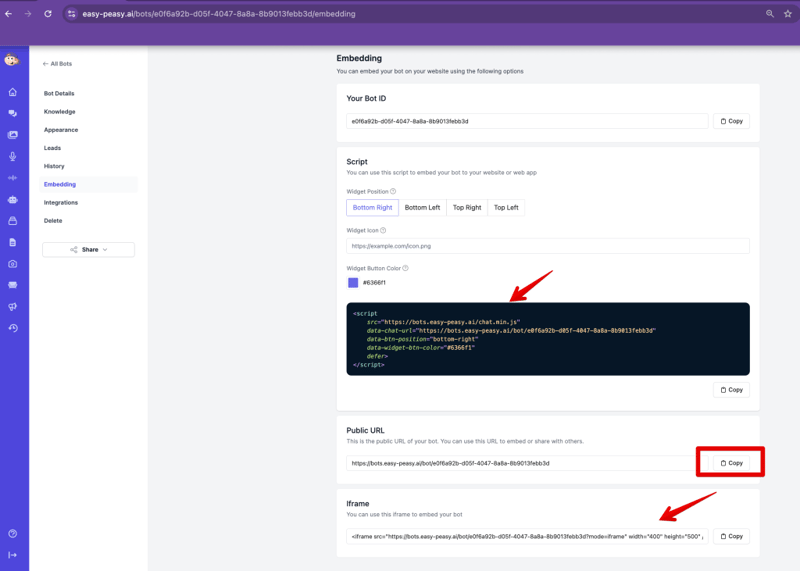
8. Embedding Your Bot
- Use Embed Section
- Obtain a code snippet for website integration.
- Check Public URL
- View your bot online using the provided URL
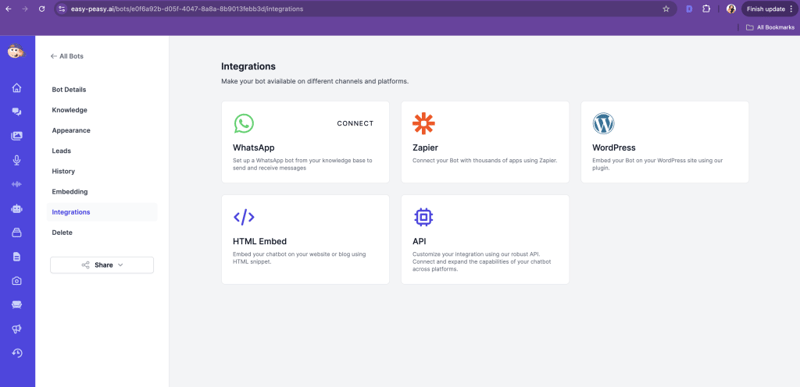
8. Integrating with Other Platforms
- Explore Integrations
- Follow guides for WhatsApp, Zapier, WordPress, etc.
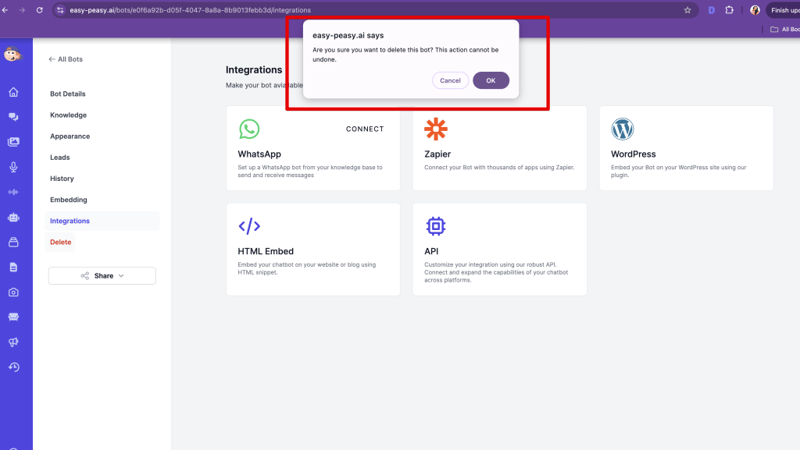
8. Deleting a Bot
- Remove a Bot
- Click “Delete” to permanently remove a bot.
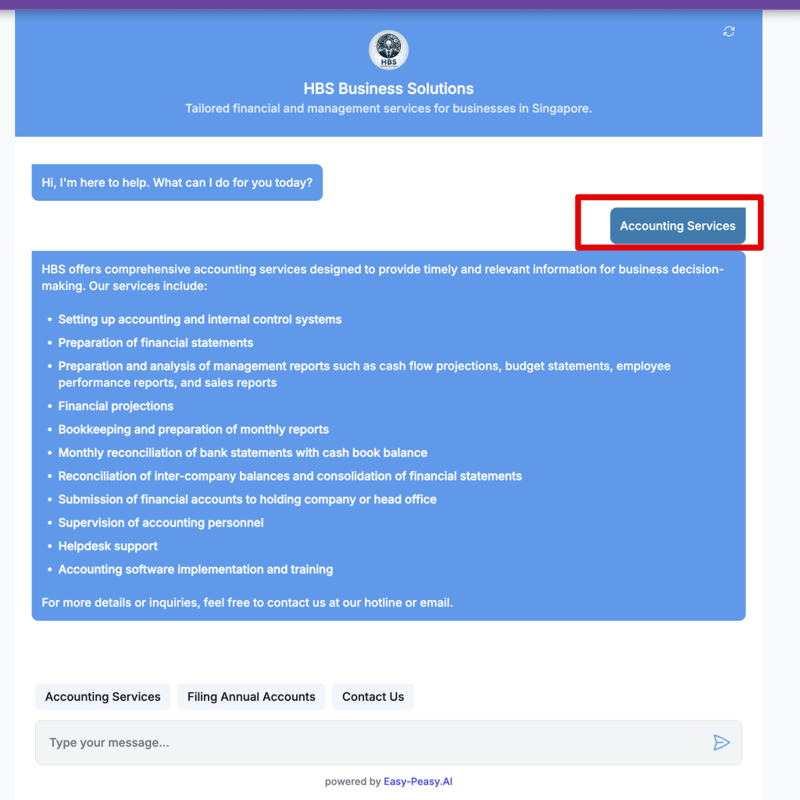
8. Testing Your Bot
- Ask a Sample Question
Conclusion
Congratulations! You’ve successfully created and launched your first AI bot with Easy-Peasy.AI. Enjoy exploring the possibilities as you further customize and integrate your solutions. Happy creating!
Happy creating!