Transform your photos into magical animated videos with unique artistic styles using Easy-Peasy.AI’s powerful workflow automation. This step-by-step guide shows you how to recreate the viral “Knitted City” video effect – and adapt it for any style or subject!
What You’ll Create
By the end of this tutorial, you’ll have:
- Multiple photos transformed into a unique artistic style (knitted, clay, LEGO, watercolor, etc.)
- Animated videos of each scene with realistic movement
- A special finale animation with text appearing in your chosen style
- One merged video with all clips combined
Prerequisites
- An Easy-Peasy.AI account (sign up at easy-peasy.ai)
- 5-12 high-quality photos (we recommend 16:9 aspect ratio)
Beyond Cities: Use Cases & Style Ideas
While we use the “Knitted City” as our example, this technique works for any subject and any style:
Subject Ideas
| Subject | Great For |
|---|---|
| City landmarks | Tourism videos, city showcases |
| Nature scenes | Landscapes, forests, beaches |
| Products | E-commerce, brand videos |
| Food | Restaurant promos, recipe content |
| Pets & Animals | Fun social media content |
| Portraits | Creative profile videos |
| Interior spaces | Real estate, design showcases |
| Events | Weddings, parties, concerts |
Style Ideas
| Style | Prompt Keywords |
|---|---|
| Knitted/Yarn | knitted fabric style, yarn structures, stitch details, wool texture |
| Clay/Claymation | clay sculpture style, plasticine texture, stop-motion look, handcrafted |
| LEGO/Blocks | LEGO brick style, plastic blocks, toy construction, miniature |
| Watercolor | watercolor painting, wet paint texture, artistic brushstrokes, paper texture |
| Paper Craft | paper craft style, origami, folded paper, cardstock texture |
| Pixel Art | pixel art style, 8-bit, retro gaming, blocky pixels |
| Stained Glass | stained glass style, colorful glass panels, lead lines, cathedral window |
| Gingerbread | gingerbread house style, icing details, candy decorations, holiday |
| Ice/Crystal | ice sculpture, crystal formation, frozen, translucent, frost details |
| Steampunk | steampunk style, brass gears, Victorian machinery, copper pipes |
Part 1: Prepare Your Images
Selecting the Right Photos
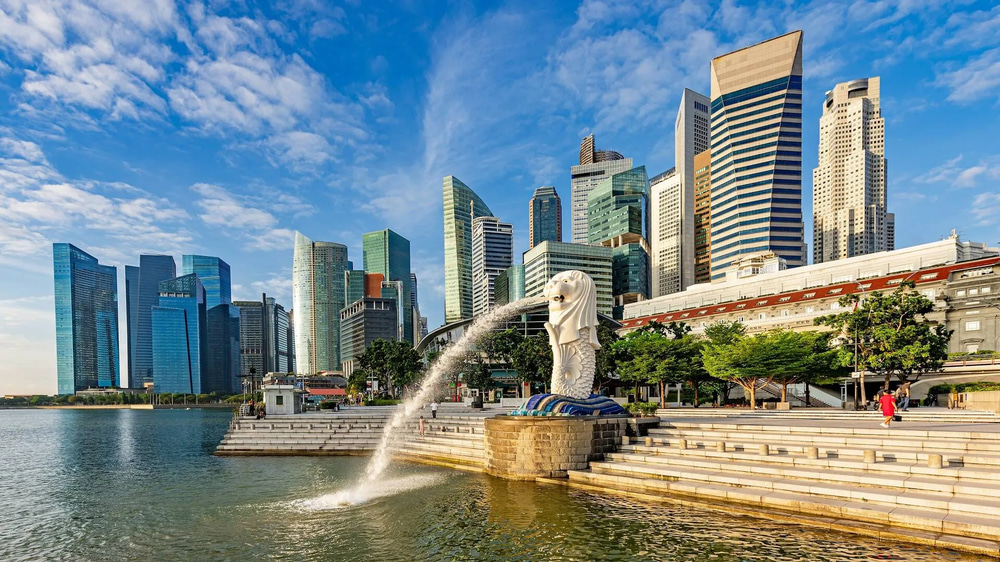
For best results, choose photos that:
- Have clear details and structure
- Are high resolution (at least 1920×1080)
- Have good lighting and contrast
- Feature recognizable subjects
Pro tip: Collect 8-12 different photos to create a compelling video montage.
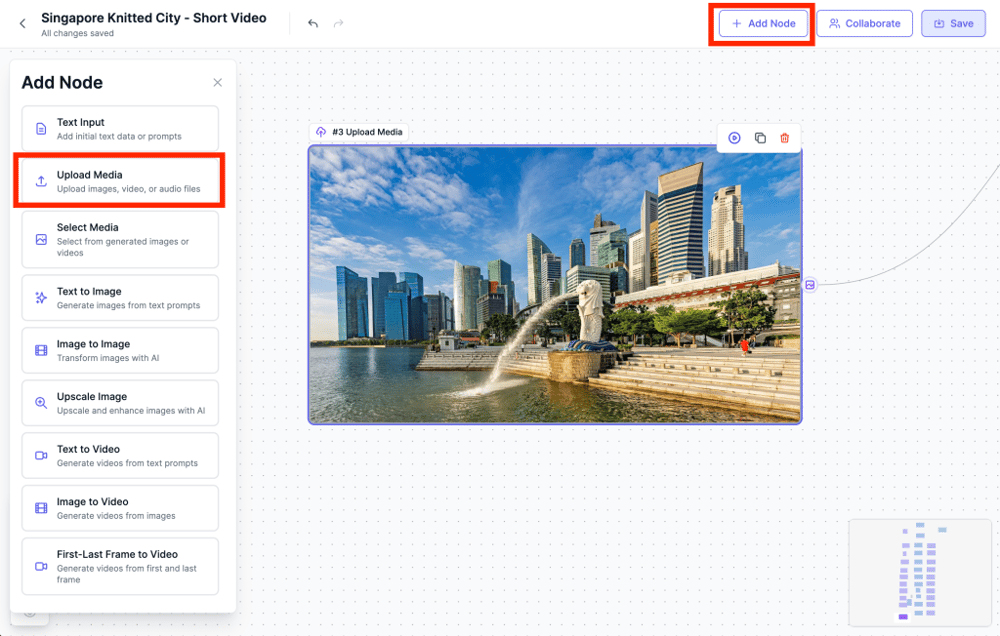
Use the Upload Media node to select photos from your computer.
Part 2: Using the Workflow Template
Step 1: Access the Workflow
- Log into Easy-Peasy.AI
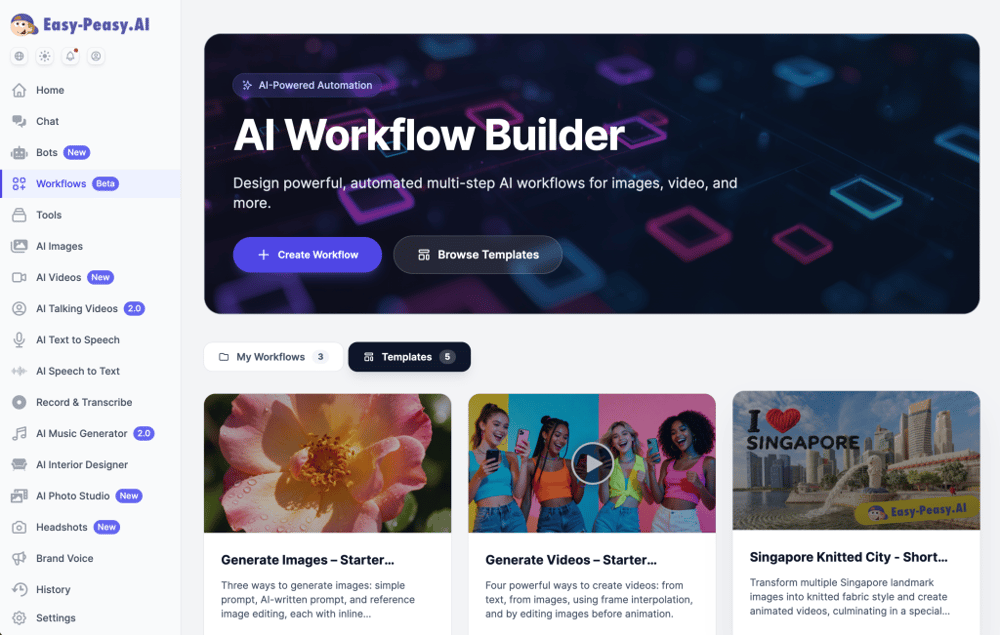
- Navigate to AI Workflows from the main menu
- Browse templates and find “Singapore Knitted City – Short Video”
- Click Use Template to create your own copy
Step 2: Understanding the Workflow Structure
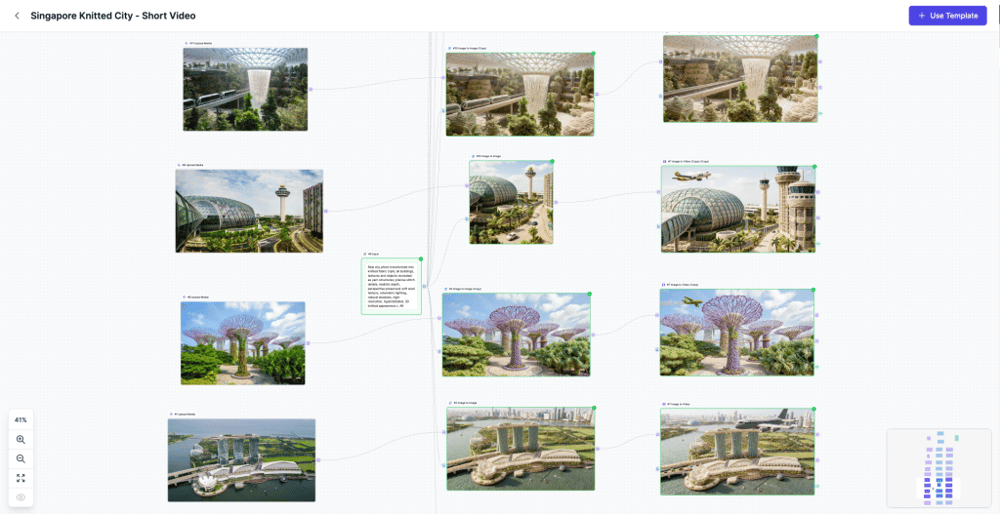
The template uses a simple but powerful pattern repeated for each image:
Upload Image → Image to Image (Style Transfer) → Image to Video (Animation)
All Image-to-Image nodes share a single Input node containing the master prompt, making it easy to maintain consistency across all images.
Part 3: The Magic Prompt
The Core Knitted Style Prompt
This is the prompt that transforms regular photos into knitted masterpieces:
Real city photo transformed into knitted fabric style; all buildings, textures and objects recreated as yarn structures; precise stitch details, realistic depth, perspective preserved; soft wool texture, volumetric lighting, natural shadows, high-resolution, hyperdetailed, 3D knitted appearance, 4K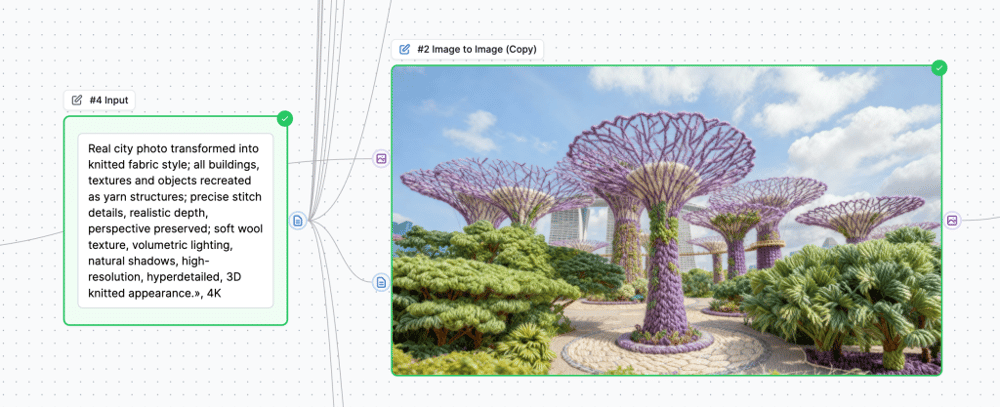
Why This Prompt Works
| Element | Purpose |
|---|---|
Real city photo transformed into knitted fabric style | Sets the base transformation goal |
all buildings, textures and objects recreated as yarn structures | Ensures everything gets the knitted treatment |
precise stitch details | Adds realistic yarn texture |
realistic depth, perspective preserved | Maintains the 3D feel of the original |
soft wool texture | Creates that cozy, fabric appearance |
volumetric lighting, natural shadows | Keeps the image looking natural, not flat |
high-resolution, hyperdetailed, 3D knitted appearance, 4K | Ensures maximum quality output |
Adapting for Other Styles
Simply swap the style-specific keywords. Here’s the template:
Real photo transformed into [STYLE] style; all [OBJECTS], textures and elements recreated as [MATERIAL]; precise [TEXTURE] details, realistic depth, perspective preserved; [SURFACE QUALITY], volumetric lighting, natural shadows, high-resolution, hyperdetailed, 3D [STYLE] appearance, 4K
Example for Clay Style:
Real photo transformed into clay sculpture style; all buildings, textures and objects recreated as clay and plasticine structures; precise molded details, realistic depth, perspective preserved; smooth matte clay texture, volumetric lighting, natural shadows, high-resolution, hyperdetailed, 3D claymation appearance, 4K
Model Settings
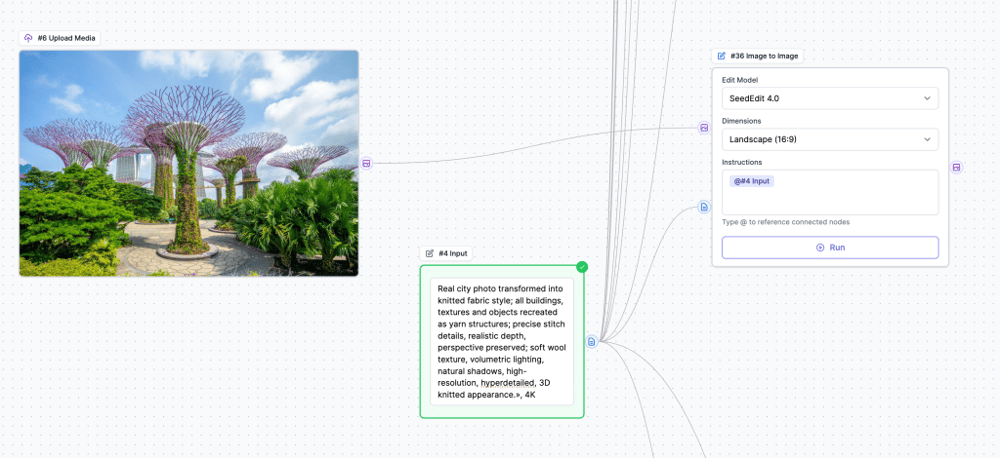
- Model: SeedEdit 4.0 or Nano Banana Pro
- Dimensions: 16:9 (matches video output)
Connecting the Nodes
To set up the Image to Image node:
- Connect the image: Drag the output handle from your Upload Media node to the image input of the Image to Image node
- Connect the prompt: Drag the text output from your Input node to the prompt input of the Image to Image node
Alternative: You can also type the prompt directly into the Instructions field within the Image to Image node instead of using a separate Input node. However, using an Input node makes it easier to maintain consistency when you have multiple Image to Image nodes sharing the same prompt.
Part 4: Creating Animated Videos
Step 1: Image to Video Settings
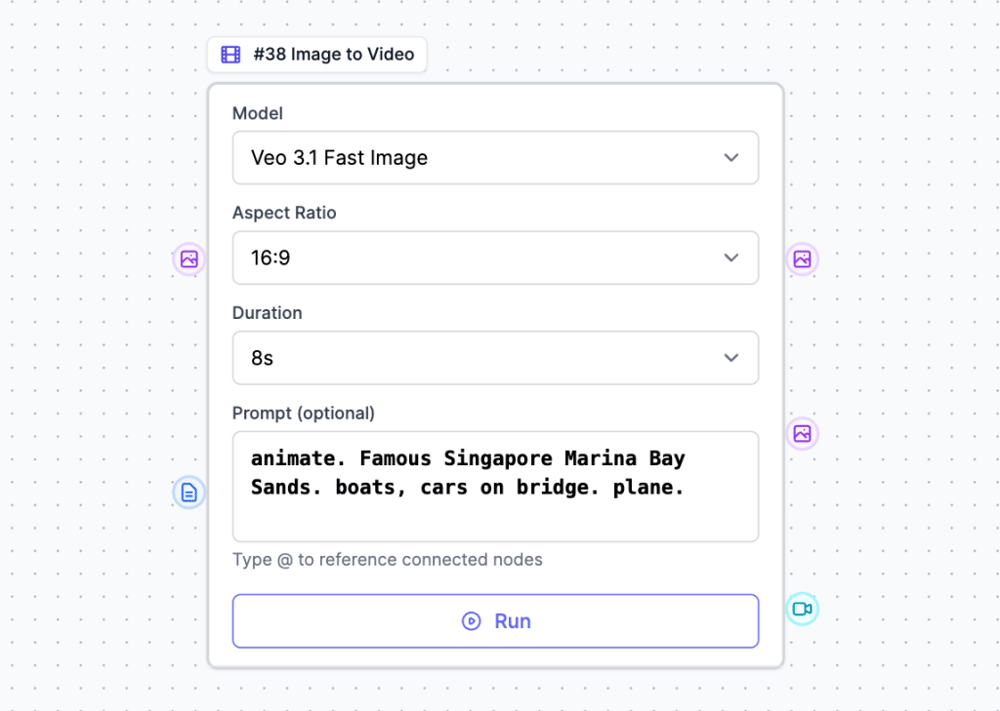
After transforming each photo, animate it using:
- Model: Veo 3.1 Fast Image or Veo 3.1 Image (consumes more credits)
- Duration: 8 seconds
- Aspect Ratio: 16:9
Step 2: Animation Prompts
The animation prompt describes what movement you want. Keep it simple and specific to each scene.
Example prompts for city scenes:
| Scene | Animation Prompt |
|---|---|
| Marina Bay Sands | animate. Famous Singapore Marina Bay Sands. boats, cars on bridge. plane. |
| Merlion | animate. Famous Singapore Merlions. boats, people walking, plane. |
| Gardens by the Bay | animate. Famous Singapore Gardens By the Bay. people walking. Plane |
| City Skyline | animate. City skyline. cars moving on roads. clouds drifting. |
Example prompts for other subjects:
| Subject | Animation Prompt |
|---|---|
| Beach | animate. Waves gently crashing. seagulls flying. clouds moving. |
| Forest | animate. Trees swaying in wind. birds flying. sunlight flickering through leaves. |
| Food | animate. Steam rising. slight camera movement. ambient lighting shift. |
| Pet portrait | animate. Gentle breathing movement. ears twitching. eyes blinking. |
| Product | animate. Slow rotation. subtle reflections. atmospheric particles. |
Animation Prompt Tips
- Start with “animate” – Signals the AI to create movement
- Describe the scene – Helps the AI understand context
- List 2-3 moving elements – Keep it focused
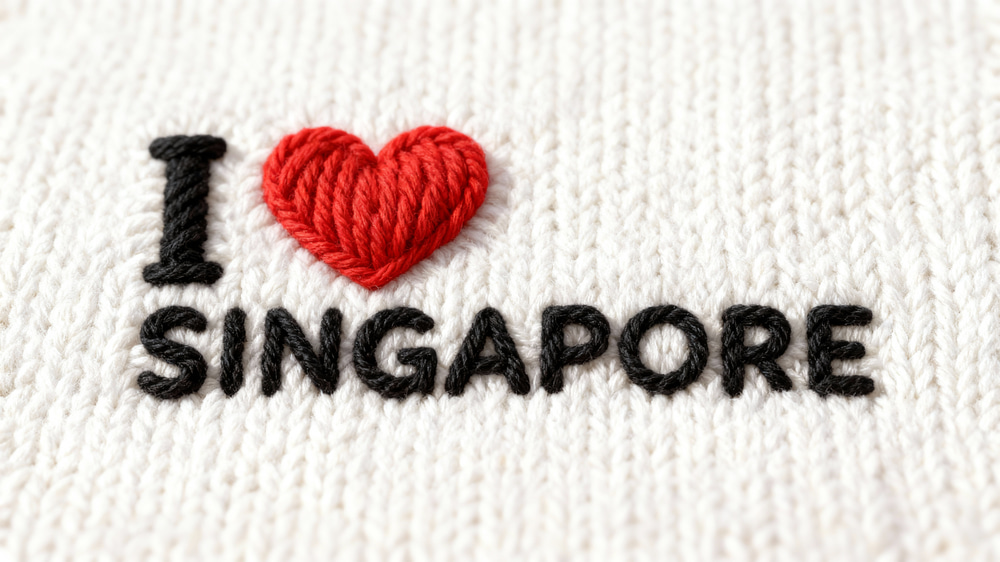
Part 5: The Grand Finale – Text Animation
Creating the Text Reveal Effect
The most impressive part is the finale where text appears to be created in your chosen style, letter by letter.
Step 1: Create the Text Image
First, generate an image with your text in the same style:
- Take a simple background or scene image
- Use Image-to-Image with the knitted style prompt
Then create a version WITHOUT the text using:
remove Singapore word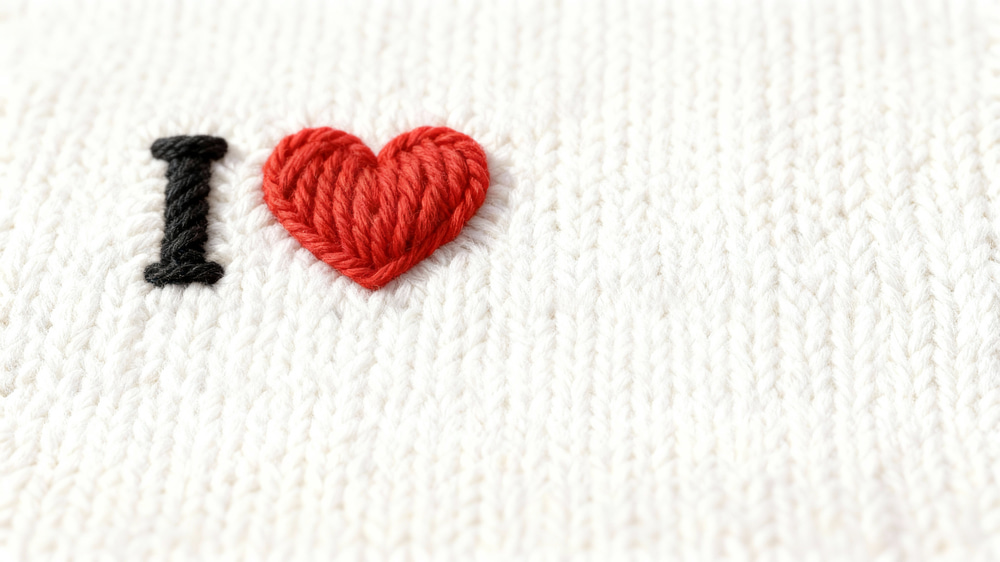
Step 2: First-Last Frame Animation
Use the First-Last Frame to Video node:
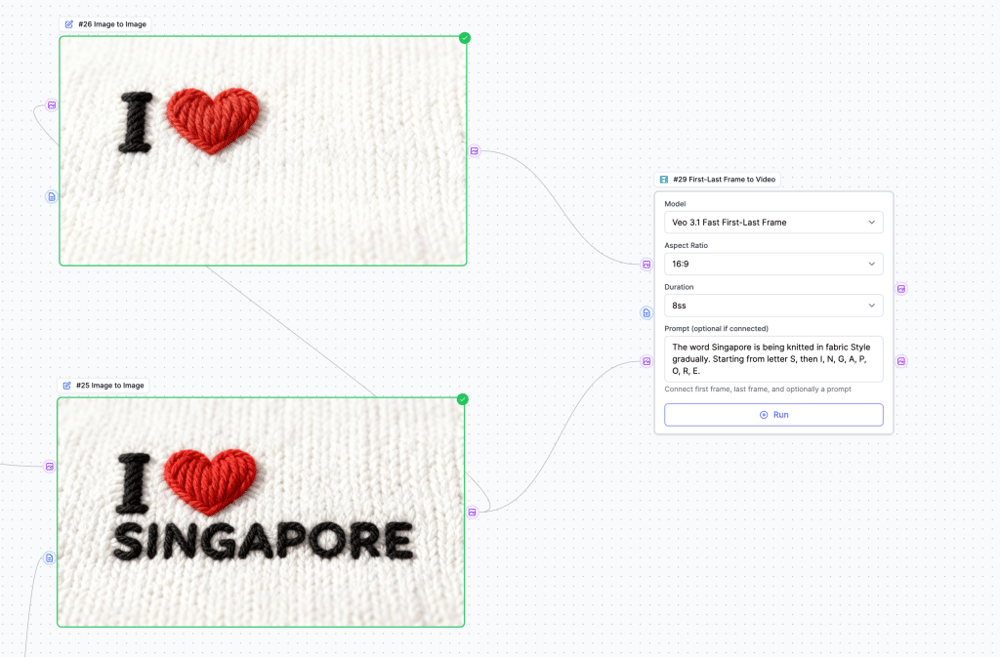
- Model: Veo 3.1 Fast First-Last Frame
- First Frame: Image WITHOUT text
- Last Frame: Image WITH text
- Duration: 8 seconds
Animation Prompt for Text:
The word Singapore is being knitted in fabric Style gradually. Starting from letter S, then I, N, G, A, P, O, R, E.
Customize for your own text:
The word [YOUR WORD] is being [CREATED/KNITTED/SCULPTED/BUILT] in [STYLE] style gradually. Starting from letter [FIRST], then [SECOND], [THIRD], etc.
Part 6: Merging Videos in the Workflow
Using the Merge Videos Node
You can combine all your video clips directly in Easy-Peasy.AI without needing external software!
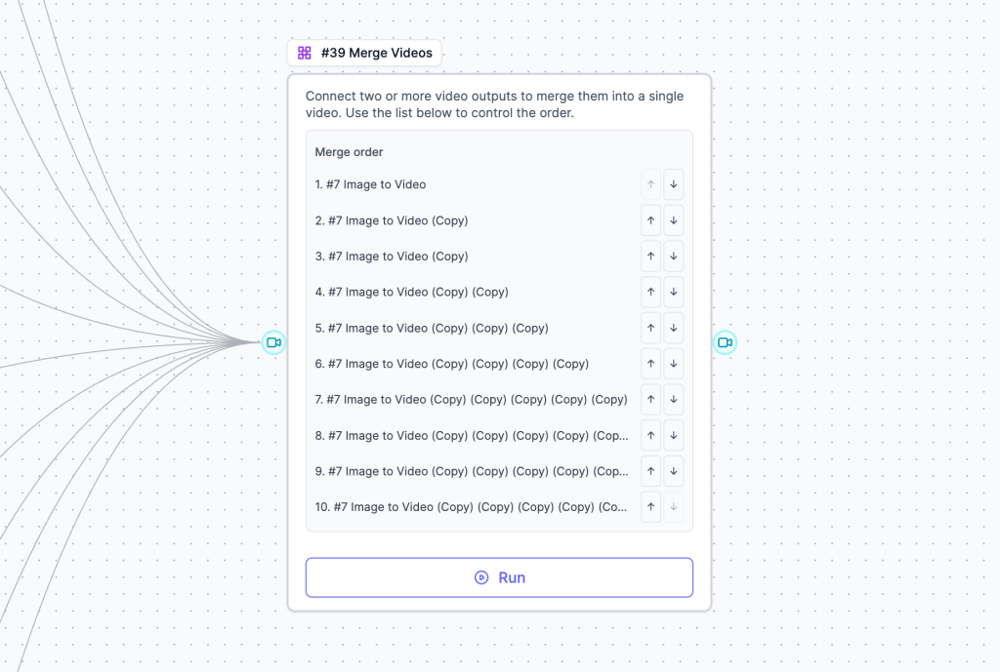
How to Add Merge Videos:
- Add a Merge Videos node to your workflow
- Connect all your Image-to-Video outputs to the Merge Videos input
- Arrange the order by connecting them in sequence
- Run the workflow to get one combined video
Merge Videos Settings
- Connect videos in the order you want them to appear
- The node automatically combines all clips into a single video
- Download the final merged video directly from the node output
Pro tip: You can still download individual clips if you want to add transitions or music in an external editor.
Part 7: Building Your Own Workflow
Option A: Modify the Template
- Open the Singapore Knitted City template
- Replace the uploaded images with your own photos
- Update the Input node prompt for your desired style
- Update animation prompts to match your scenes
- Add a Merge Videos node to combine clips
- Run the workflow
Option B: Build From Scratch
Create a new workflow with these nodes:
- Input Node – Contains the master style prompt
- For each image:
- Upload Media – Your source photo
- Image to Image – Connected to both the upload and input nodes
- Image to Video – Connected to the Image to Image output
- Merge Videos – Connected to all Image to Video outputs
Connecting Nodes
- Connect the Input node output to all Image-to-Image prompt inputs
- Connect each Upload node to its corresponding Image-to-Image image input
- Connect each Image-to-Image output to an Image-to-Video input
- Connect all Image-to-Video outputs to the Merge Videos node
Part 8: External Video Editing (Optional)
If you want more control over transitions and audio, you can edit externally:
- Download all clips from Easy-Peasy.AI
- Import into your video editor (CapCut, Premiere, DaVinci Resolve, etc.)
- Arrange clips in your preferred order
- Add transitions – Crossfades work great for smooth flow
- Add music – Match the mood of your style (cozy for knitted, playful for clay, etc.)
- Export your final video
Recommended Video Structure
- Opening shot (establishing scene)
- 6-10 scene clips
- Text reveal finale
- Optional: End card with call-to-action
Pro Tips for Best Results
Image Quality
- Use the highest resolution source images possible
- Avoid heavily compressed JPEGs
- Photos with clear structure and details work best
Consistency
- Use the SAME prompt for all Image-to-Image transformations
- Use the SAME aspect ratio throughout (16:9 recommended)
- Keep animation duration consistent (8 seconds each)
Style-Specific Tips
| Style | Tip |
|---|---|
| Knitted | Works best with architectural/geometric subjects |
| Clay | Great for characters, animals, and rounded objects |
| LEGO | Perfect for buildings and structured scenes |
| Watercolor | Beautiful for nature and landscapes |
| Paper craft | Excellent for flat or layered compositions |
Troubleshooting
Images look too flat
- Add “volumetric lighting, natural shadows” to your prompt
- Ensure “3D [style] appearance” is included
Animation is too subtle
- Make your animation prompt more specific
- Add more movement elements
Inconsistent style across images
- Use the same Input node connected to all Image-to-Image nodes
- Don’t modify the prompt for individual images
Text animation not working well
- Ensure first and last frames are similar except for the text
- Use clear, large text that contrasts with the background
Merge Videos order is wrong
- Check the connection order to the Merge Videos node
- Reconnect in the correct sequence
Need Help?
- Check out our AI Workflows documentation
- Join our community for tips and inspiration
- Share your creations with #EasyPeasyAI
Happy creating!