AI image editing models have come a long way. Tools like Nano Banana Pro, FLUX.2, and Seedream 4.5 can now handle complex edits – changing outfits, swapping backgrounds, adjusting lighting, removing objects – with impressive accuracy.
But there’s always been one frustrating bottleneck: the prompt.
You know exactly what you want to change. You can see it. You can point at it. But translating that into the right words? That’s where things fall apart. “Move the object slightly to the left.” “Make the sky more dramatic – no, not that dramatic.” “Change the color of the shirt – the one on the right, not the left.”
Prompt-based image editing is a guessing game, even when the AI model behind it is powerful enough to do exactly what you want.
That’s why we built Visual Edit.
What Is Visual Edit?
Visual Edit is a new way to edit AI-generated images (or any image you upload) inside Easy-Peasy.AI. Instead of writing a single prompt and hoping the AI understands which part of the image you’re referring to, you click directly on the areas you want to change and describe what should happen there.
Here’s how it works:
- Open any image in the Edit Image modal
- Switch to Visual Edit mode using the toggle at the top of the prompt form
- Click anywhere on the image to place a numbered marker
- Type a short description of what you want changed at that spot
- Add as many markers as you need — each one targets a different area
- Hit Generate — the AI applies all your changes at once
That’s it. No prompt engineering. No trial and error describing positions. You point, you describe, and the AI does the rest.
Why Visual Annotations Beat Text Prompts for Image Editing
Modern image editing models are incredibly capable. The problem was never the AI – it was the interface between you and the AI. Here’s what Visual Edit solves:
1. Precision Without Complexity
When you write “change the color of the car,” which car? In a scene with multiple objects, text prompts are ambiguous. With Visual Edit, you click on the exact element. The marker records its position – top-left, center, bottom-right — and passes that spatial context directly to the AI model.
2. Multiple Edits in One Go
Instead of running the same image through 3–4 separate prompt-based edits (and risking quality loss each time), you can place multiple markers across the image. Want to change the sky, remove an object in the corner, and adjust someone’s outfit? Add three markers, describe each change, and generate once.
3. Faster Iteration
Visual Edit includes undo/redo support, drag-to-reposition markers, and a clear-all option. If the result isn’t perfect, adjust your descriptions and regenerate. The feedback loop is much tighter than rewriting prompts from scratch.
4. Works With the Best AI Editing Models
Visual Edit isn’t tied to a single AI model. You can combine it with any of the editing models available on Easy-Peasy.AI:
- Nano Banana Pro – Fast, high-quality edits with support for up to 4K resolution
- FLUX.2 [max] / [pro] / [flex] – Black Forest Labs’ latest, great for detailed style changes
- Seedream 4.5 – ByteDance’s model with excellent color and composition handling
- OpenAI GPT Image 1.5 – OpenAI’s native image editing with strong instruction following
- Flux Kontext Pro / Max – Optimized for context-aware edits and character consistency
- Reve / Reve Fast – Lightweight options for quick iterations
- And more, including Qwen Image, Ideogram v3, and Seedream 4.0
Each model has different strengths. Visual Edit lets you pick the right tool for the job while keeping the editing experience consistent.
How to Use Visual Edit — Step by Step
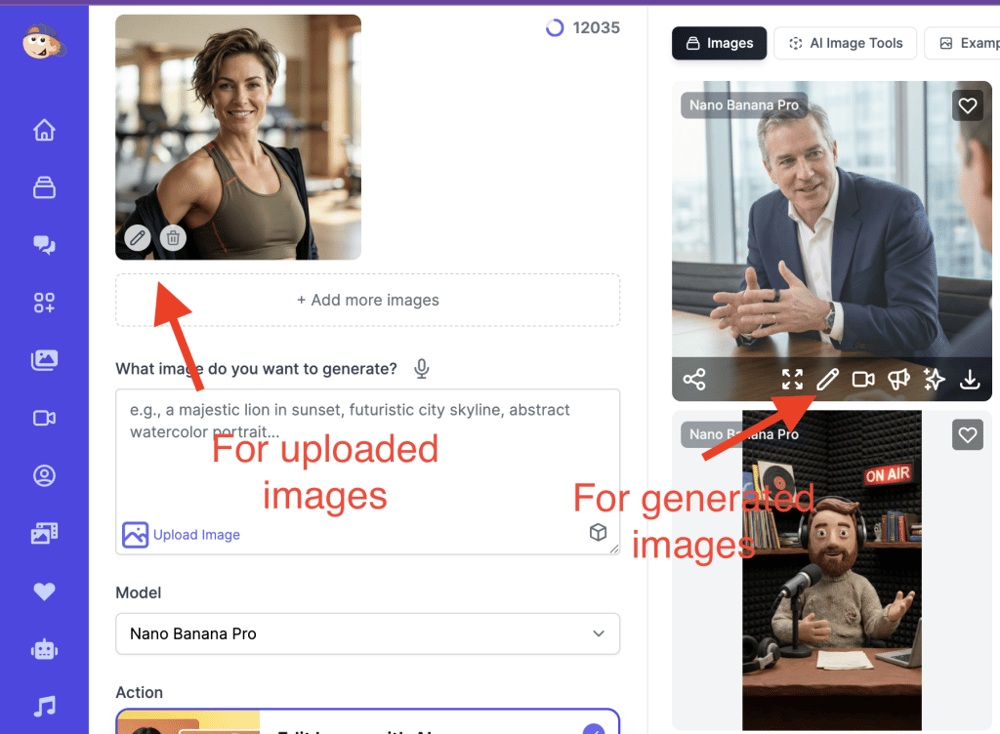
Step 1: Open the Image Editor
Navigate to the AI Image Generator, upload the image you want to edit (or generate a new one), and click the Edit button.
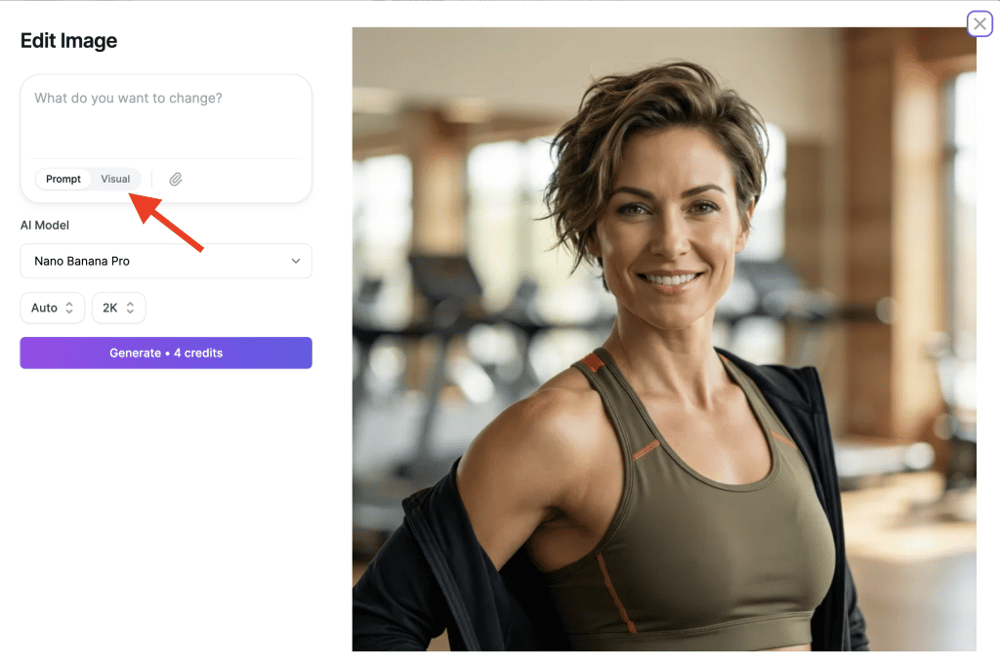
Step 2: Switch to Visual Mode
At the top of the prompt area, you’ll see a mode toggle. Switch from Prompt to Visual. The image will expand to give you a full workspace.
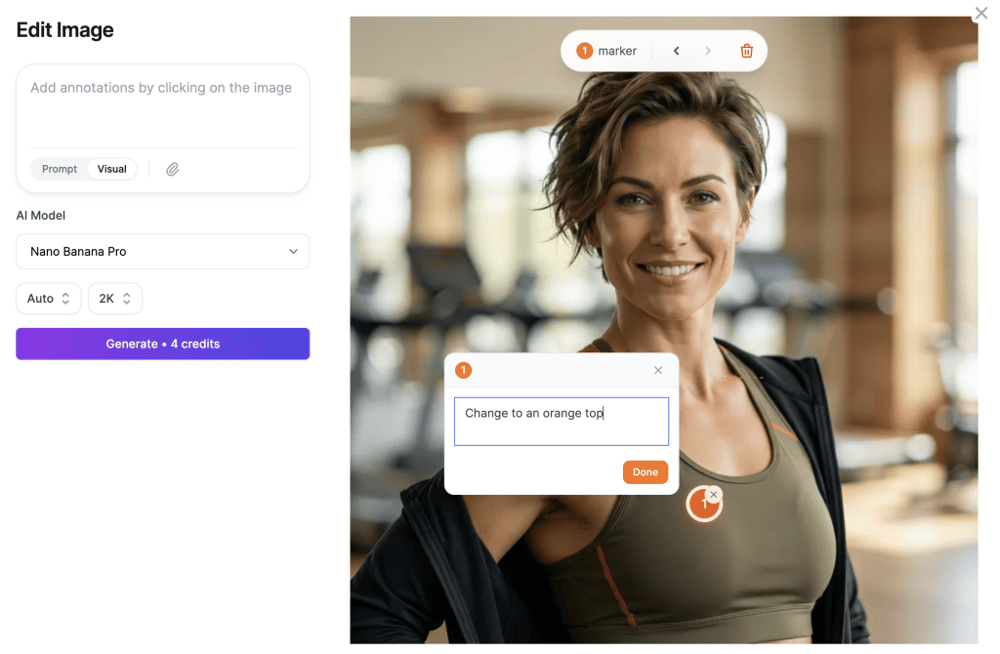
Step 3: Place Your Markers
Click on the image where you want to make a change. A numbered pin will appear. A text input will pop up – describe what you want the AI to do at that spot.
Examples of good marker descriptions:
- “Change to an orange top”
- “Remove this object”
- “Make the sky a sunset gradient”
- “Add sunglasses”
- “Change background to a beach”
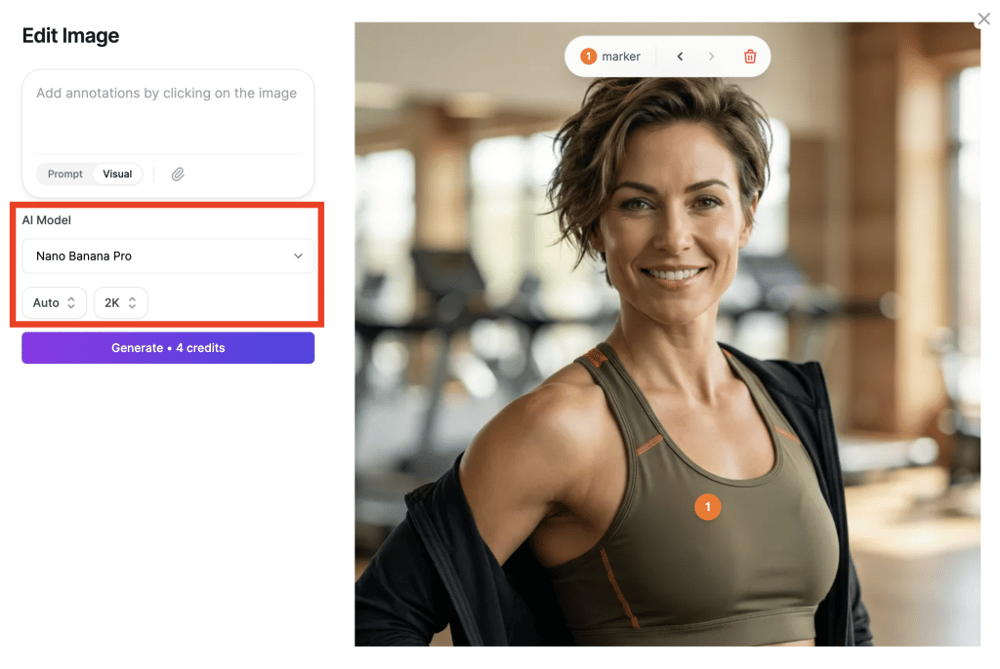
Step 4: Choose Your Model and Settings
Select the editing model that fits your needs. If the model supports resolution options (1K, 2K, 4K), pick your preferred output quality. You can also adjust the aspect ratio.
Step 5: Generate
Click Generate. The AI will process all your annotations and produce an edited image. The original is preserved in the image history, so you can always go back or continue editing from any version.
Tips for Getting the Best Results
- Be specific in your descriptions. “Make hair blonde” works better than “change hair.”
- Place markers precisely. Click directly on the element you want to change, not near it.
- Use fewer markers for subtle edits and more for complex scene changes.
- Try different models. If one model doesn’t nail the edit, switch to another – the markers stay in place.
- Use the image history to chain edits. Edit the result of a previous edit for multi-step transformations.
- Add reference images when available – you can upload additional images to guide the AI’s understanding of style or content.
Visual Edit vs. Traditional Prompt Editing
| Prompt Editing | Visual Edit | |
|---|---|---|
| Targeting specific areas | Describe location in words | Click directly on the spot |
| Multiple edits | One prompt, hope AI gets all of them | Separate marker per edit |
| Learning curve | Requires prompt engineering skills | Point and describe |
| Iteration speed | Rewrite entire prompt each time | Adjust individual markers |
| Spatial accuracy | Depends on model interpretation | Exact coordinates sent to model |
Note: You still have access to the prompt-based editing mode. Visual Edit is an additional option, not a replacement. Some edits – like global style changes (“make this image look like a watercolor painting“) – may work better as a single prompt.
Start Editing Visually
Visual Edit is available now for all Easy-Peasy.AI users. Open any image in the editor, switch to Visual mode, and try it out.