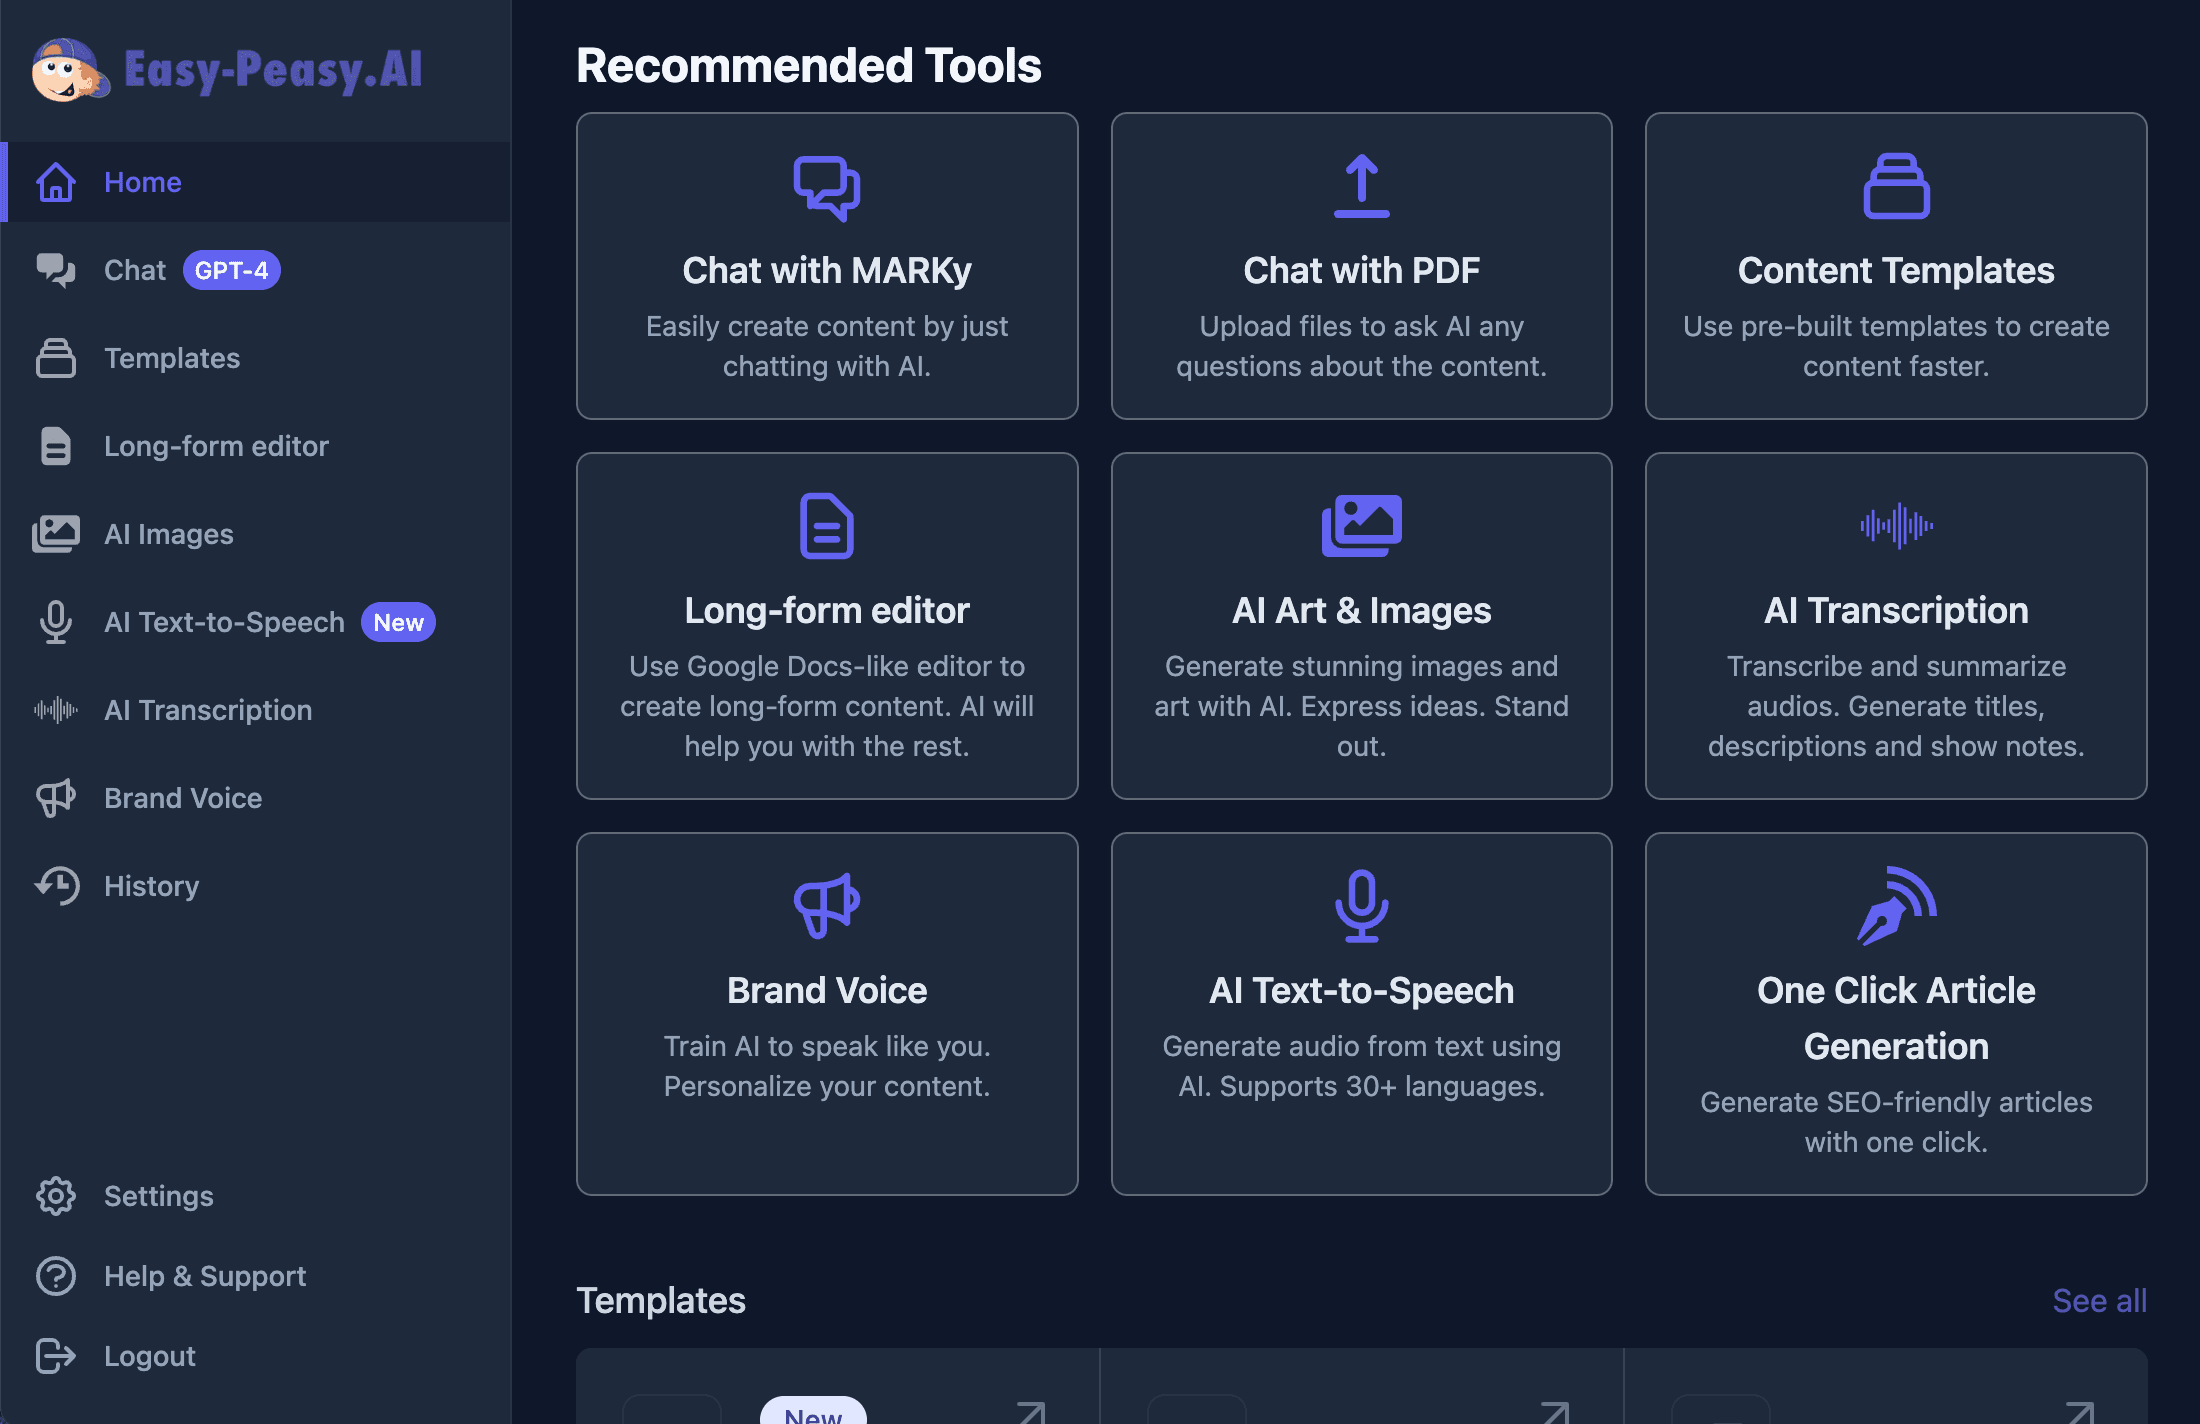
Some of the busiest real estate agents on Easy-Peasy.AI right now are new-launch specialists in Singapore. Their playbook is worth stealing: instead of filming themselves at a showflat, they generate short vertical scenes with AI — an agent on a balcony, the lap pool at dusk, the gym, the MRT connection — and stitch the chunks into one polished 40-second reel. Every scene shows the same presenter, and every scene speaks in the same voice. In this guide we recreate that exact workflow end to end using the AI Video Generator, so you can build your own real estate reels without a camera, a mic, or an editor on retainer.
Here is the finished result — five AI-generated scenes, one consistent presenter and voice, auto-generated captions, and an AI music bed, assembled entirely inside Easy-Peasy.AI:
Why New-Launch Condo Reels Are a Perfect Fit for AI Video
New-launch and pre-construction marketing has a built-in problem: the thing you are selling barely exists yet. The showflat is one unit, the pool is a render, and the neighborhood shots require a drone permit. That is why AI video works so well here — the inputs are images, and images are exactly what developers hand you.
The agents we studied all converged on the same structure:
- Short chunks, not one long take. They generate 6–15 second scenes separately, then merge them. If one scene comes out wrong, they regenerate just that scene.
- Presenter bookends. The agent appears on camera in the opening hook and the closing call to action. The middle scenes are pure amenity b-roll — pool, gym, location.
- One voice throughout. The same voice reads the hook, the amenity voiceovers, and the CTA, so the reel feels like one person talking even though every scene was generated independently.
- Vertical 9:16. These reels live on TikTok, Instagram Reels, and WhatsApp broadcasts, not YouTube.
Historically the merging step happened in CapCut. The second half of this guide shows how to do it in the built-in AI Video Editor instead — including captions, muting, and music — so the whole reel ships from one tab.
The Workflow at a Glance
| Step | Tool | Output |
|---|---|---|
| 1. Reference images | AI Image Generator (GPT Image 2 Medium) | Agent portrait + 4 amenity shots |
| 2. Voiceover | Text to Speech | 5 short clips, one consistent voice |
| 3. Video scenes | AI Video Generator (MiniMax H3 Reference) | 5 vertical clips, 6–12 seconds each |
| 4. Assembly | AI Video Editor + Music Generator | Captions, muting, music, 1080×1920 export |
Step 1: Generate Reference Images That Lock Your Look
MiniMax H3’s reference-to-video mode takes up to several reference images and keeps the people and places in them consistent across the generated footage. That makes your reference set the single most important creative decision in the whole workflow.
We generated five images with GPT Image 2 Medium, all in 9:16:
- The presenter — a professional agent in a navy suit on a condo balcony at golden hour. This is the face that must survive every scene.
- The towers — a hero exterior of the development with lush vertical gardens.
- The 50m lap pool at dusk with cabanas and warm lighting.
- The sky gym with floor-to-ceiling windows over the skyline.
- The MRT connection — a covered walkway to the station, the detail every Singapore buyer asks about first.
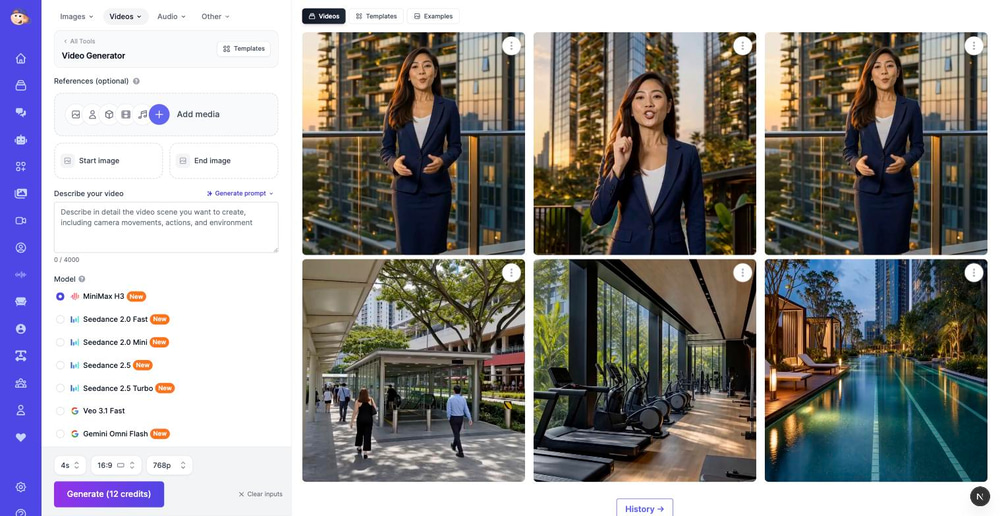
In real life you may not have to generate the property shots at all. Agents marketing a new launch are handed a full media kit by the developer — facade renders, pool and clubhouse visuals, gym interiors, site plans. Those files are exactly what this workflow wants: upload them as reference images and skip ahead to Step 2. Generate only what is missing, plus the presenter if you would rather not appear on camera yourself. Every image in this walkthrough is AI-generated because the project is fictional.
Tip: generate the presenter image first, review it critically (hands, teeth, badge-like artifacts), and only then generate the rest. Every scene inherits this person, so a flaw here is a flaw times five.
Step 2: Create One Voice for the Whole Reel
The trick that makes chunked reels feel professional is voice consistency. We wrote five short scripts — a hook, three amenity voiceovers, and a CTA — and generated all of them with the same voice in the Text to Speech tool. For a Singapore-market reel, a local accent sells; for your market, pick a voice that matches how you actually speak to clients.
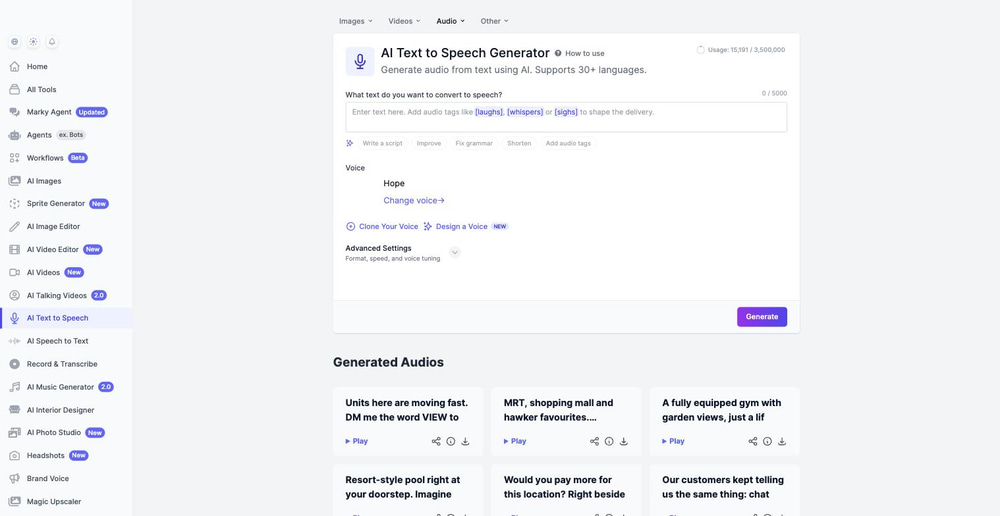
Keep each clip short. Our amenity voiceovers were one or two sentences (“Resort-style pool right at your doorstep…”), which lands them comfortably inside a 6–7 second scene. A script that runs longer than its scene forces awkward timeline surgery later.
These clips do double duty: three of them are laid onto the timeline as voiceovers in Step 4, and one of them becomes an audio reference in Step 3 — which is where the real magic happens.
Step 3: Generate the Scenes with MiniMax H3 Reference
Head to the AI Video Generator and pick MiniMax H3. As soon as you attach reference images, the model switches to its reference-to-video mode. Two inputs per scene:
- Image references: the presenter portrait plus the relevant amenity image. This is what keeps the same face, suit, and building across independently generated clips.
- An audio reference: one of your TTS clips. MiniMax H3 can clone the voice timbre from a reference clip — add a line like
Voice timbre follows reference audio 1to your prompt and the presenter in the generated video speaks in your chosen voice. Note that audio references always need at least one image reference alongside them.
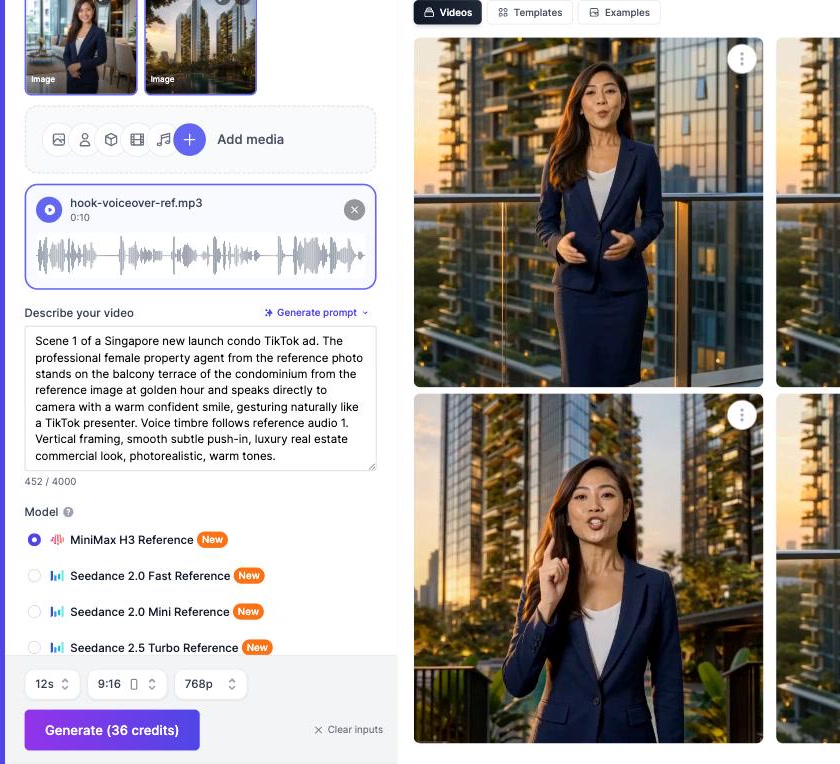
Setting up a scene takes seconds. Click Add media, open History (or All uploads for the developer’s files), and tick the presenter portrait plus the property shots that scene needs. Then click the music icon in the same row and attach your voiceover clip as the audio reference. Here is the exact setup for Scene 1 — two image references (the agent and the towers), the 10-second voiceover attached as audio, the full scene prompt, and the model switched to MiniMax H3 Reference at 12s / 9:16 / 768p for 36 credits:
Promote your own brand: the presenter does not have to be AI-generated. Upload a real photo of yourself as the first reference and every scene will feature you on camera — for an agent, your own face builds trust and name recognition in a way a synthetic presenter never will. A sharp, well-lit half-body shot in your usual work outfit works best; keep using the same photo across scenes and campaigns so the reel stays consistent.
We generated five scenes at 768p, 9:16: a 12-second opening hook with the agent speaking to camera, three 6-second amenity flyovers (pool, gym, MRT), and an 8-second closing CTA with the agent again. MiniMax H3 renders native sound — dialogue, ambience, even a music bed — on every clip whether you want it or not, which matters in the next step.
The exact prompts we used
Every prompt names the reference images out loud (“the agent from the reference photo”, “the lap pool from the reference image”), says what the camera does, and ends with the look. The two presenter scenes also carry the voice-timbre line. Copy these and swap in your own project details:
Scene 1 — the hook, 12s (agent + tower references, audio reference)
Scene 1 of a Singapore new launch condo TikTok ad. The professional female property agent from the reference photo stands on the balcony terrace of the condominium from the reference image at golden hour and speaks directly to camera with a warm confident smile, gesturing naturally like a TikTok presenter. Voice timbre follows reference audio 1. Vertical framing, smooth subtle push-in, luxury real estate commercial look, photorealistic, warm tones.
Scene 2 — the pool, 6s (pool reference)
Scene 2 of a Singapore new launch condo TikTok ad, facilities showcase. Slow cinematic dolly glide along the resort-style lap pool from the reference image at dusk, warm underwater lights glowing, cabanas and loungers, gentle water ripples, glass towers rising above, luxurious calm ambience, vertical framing, photorealistic, warm tones.
Scene 3 — the gym, 6s (gym reference)
Scene 3 of a Singapore new launch condo TikTok ad, facilities showcase. Smooth cinematic pan through the modern residents gym from the reference image, morning light streaming through floor-to-ceiling windows onto premium equipment, lush greenery visible outside, aspirational healthy lifestyle mood, vertical framing, photorealistic.
Scene 4 — the location, 6s (neighbourhood reference)
Scene 4 of a Singapore new launch condo TikTok ad, location and amenities. Energetic handheld-style walkthrough of the vibrant neighbourhood from the reference image: MRT station entrance, covered walkway, shopping mall and hawker centre, commuters strolling under lush rain trees, bright tropical daylight, upbeat city energy, vertical framing, photorealistic.
Scene 5 — the call to action, 8s (agent + entrance references, audio reference)
Scene 5 of a Singapore new launch condo TikTok ad, the closing call to action. The professional female property agent from the reference photo stands at the condominium entrance from the reference image, speaks directly to camera with urgency and a warm smile, pointing at the viewer and then beckoning. Voice timbre follows reference audio 1. Vertical framing, energetic push-in, luxury real estate commercial look, photorealistic, warm evening light.
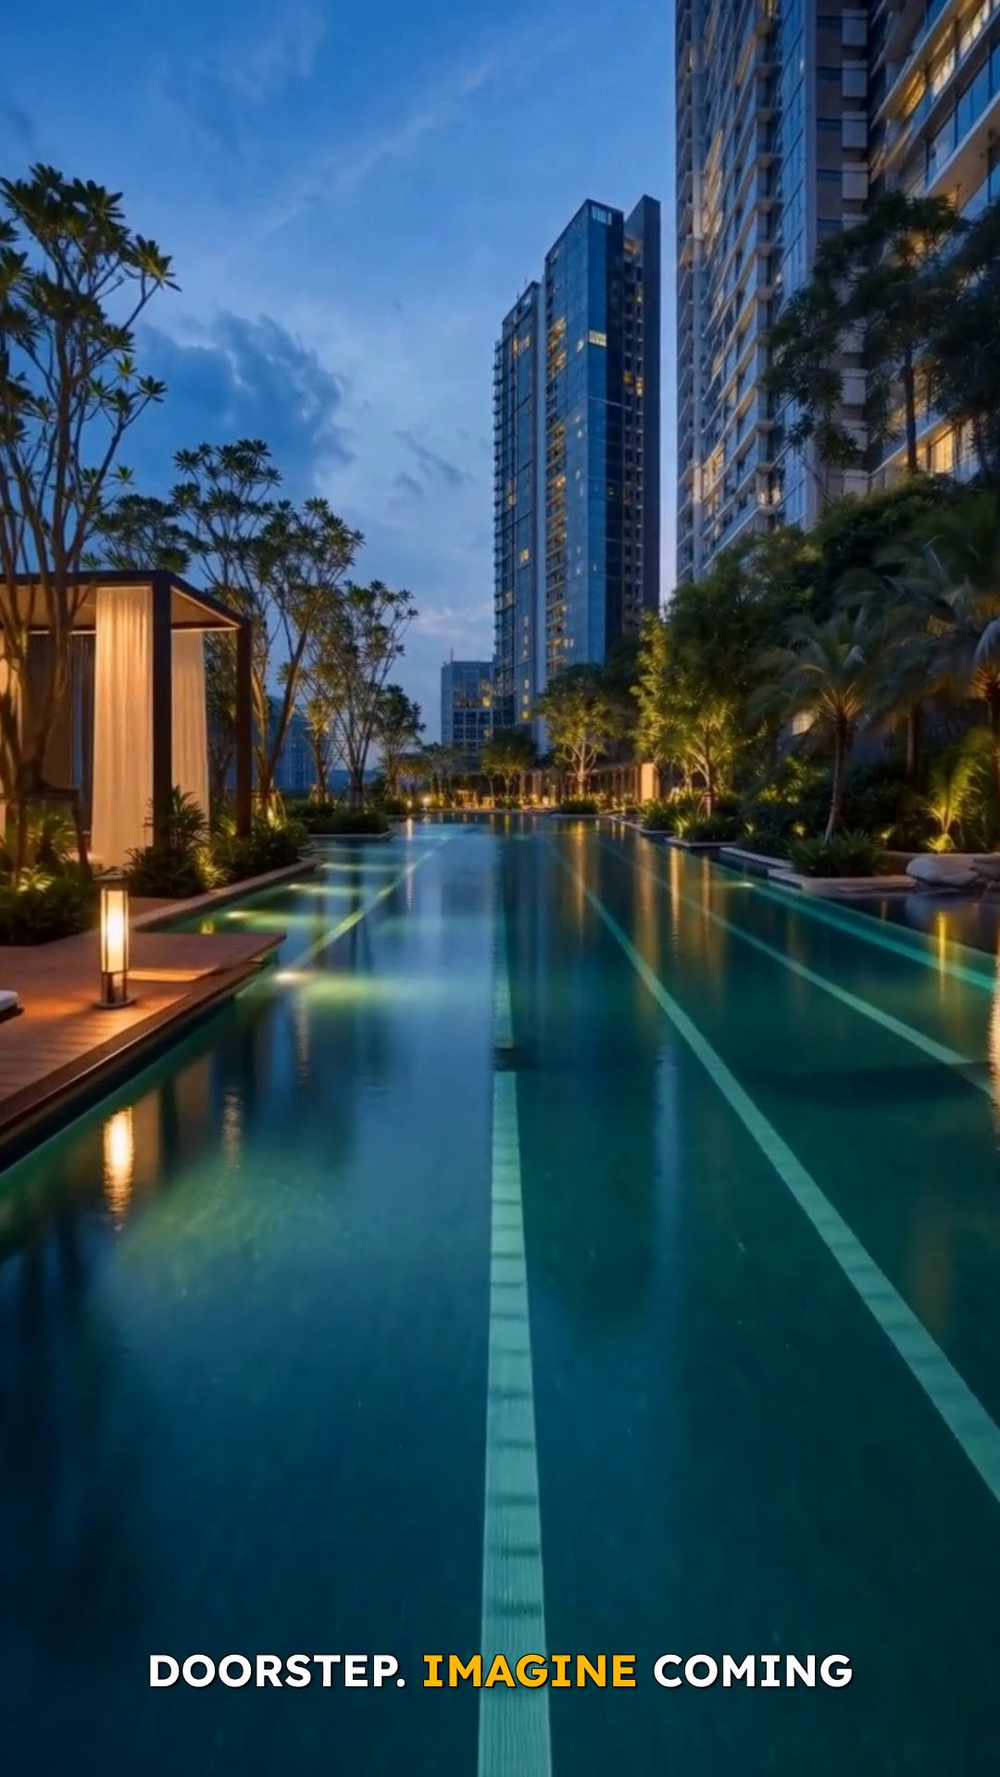
Here is the raw pool scene exactly as H3 returned it, before any editing:
At 768p, MiniMax H3 costs 3 credits per second, so the five scenes came to 114 credits in total: 36 for the 12-second hook, 18 for each 6-second amenity scene, and 24 for the 8-second close. If a scene disappoints, regenerate only that scene; the reference images guarantee the new take still matches the rest.
MiniMax H3 is not your only option
The moment you attach a reference image the model list filters itself down to the models that can use it, and MiniMax H3 Reference sits at the top of a short list worth knowing:
- Seedance 2.0 Mini Reference — the budget pick at 2 credits per second (480p), and it works on the Free plan. Fine for amenity b-roll.
- Seedance 2.0 Fast Reference — 3 credits per second at 480p, 6 at 720p. The middle ground when Mini looks too soft.
- Seedance 2.5 Reference — the newest flagship: a single generation can run up to 30 seconds, at 6 credits per second (480p) or 12 (720p). Reach for it when you want one long take instead of chunks.
- Seedance 2.5 Turbo Reference — 720p and 1080p only at 7 credits per second, the cheapest route to a full-HD vertical clip.
All of them take the same reference images and the same audio reference, so you can mix models inside one reel — MiniMax H3 for the two talking scenes, a cheaper Seedance model for the silent amenity shots. The Generate button always shows the exact cost for the model, duration and resolution you picked before you spend anything.
Step 4: Assemble the Reel in the AI Video Editor
Open the AI Video Editor and create a 9:16 project.
Click Import in the media panel and the Media Gallery opens onto everything you have ever generated, split into Videos, Images, Music, Voice and SFX tabs. Search by prompt to narrow it to this project’s scenes, then hit Add to Timeline on each one in order:
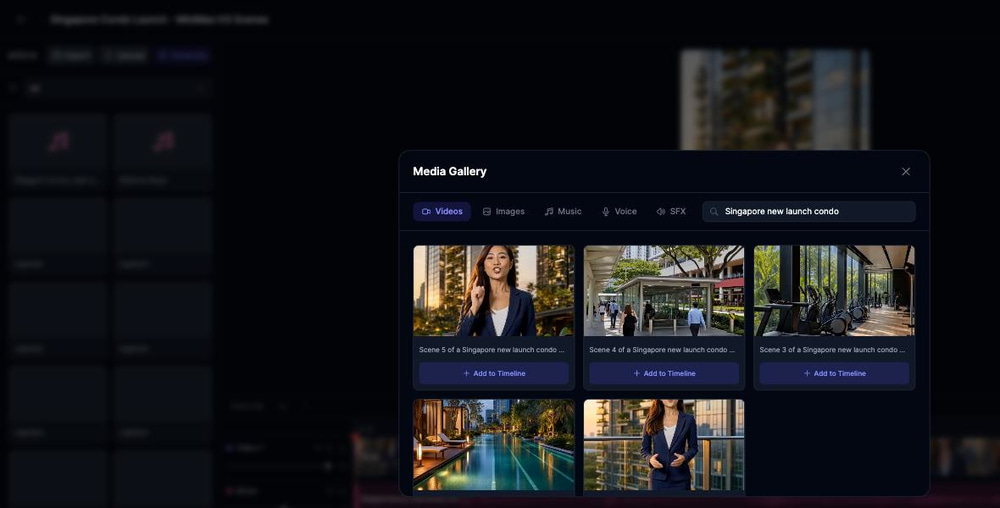
The same gallery is where the voiceovers and the music track come from later: the Voice and Music tabs list everything you made in Text to Speech and the Music Generator, so nothing has to be downloaded and re-uploaded.
Drop the five scenes onto the video track in order. Then three finishing moves turn the chunks into a reel:
Mute the b-roll scenes
Because H3 bakes audio into every clip, your three amenity scenes arrive with their own ambient sound and stray music. The presenter is not on screen in those scenes, so their native audio is noise. Select each middle clip and drop its volume to zero, then lay your TTS voiceover clips on the voiceover track, aligned to the start of each scene. The opening and closing scenes keep their native audio — that is the presenter actually speaking.
Generate captions automatically
Click Captions in the editor header and let it transcribe the timeline. It generates word-timed, TikTok-style captions with an active-word highlight — the same style you see on every high-performing property reel. Captions are not optional for this format: most feed viewers watch with sound off, at least until the pool shows up.
Add an AI music bed
We generated a smooth instrumental in the Music Generator — the prompt asked for a warm, sophisticated lounge track that says “luxury property” without fighting the voiceover — then imported it into the editor’s music track.
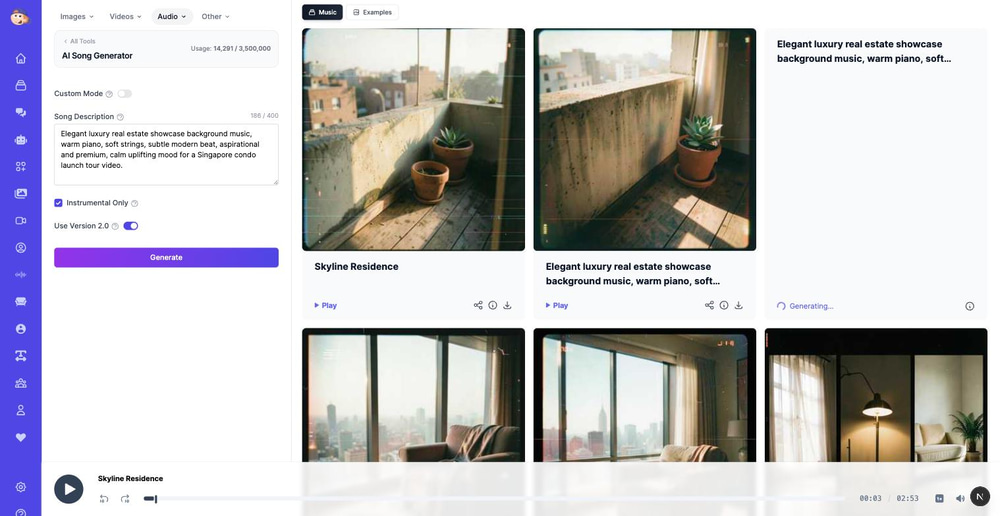
Two settings make music work under speech: pull the music clip’s volume down to about 20%, and add a two-second fade-out at the end so the reel does not stop dead.
Here is the finished timeline — video, music, voiceover, and caption tracks all visible:
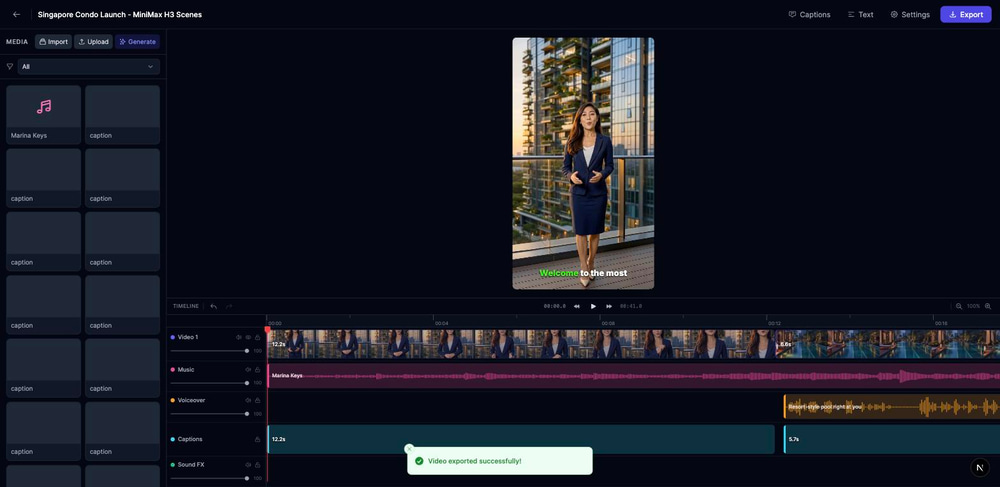
Hit Export, choose 1080p, and a minute later you have a 1080×1920 MP4 ready for Reels, TikTok, and your WhatsApp broadcast list. The export itself costs 2 credits.
Tips From the Agents Who Do This Every Week
- Write the shot list before generating anything. Hook, three amenities, CTA. Knowing the structure tells you exactly which reference images and voiceover lines you need — no wasted generations.
- Presenter in scenes 1 and 5 only. Talking-head consistency is the hardest thing for AI video; using it only at the bookends keeps quality high and costs down.
- Match script length to scene length. One sentence per 6-second scene. If the voiceover overruns, trim the script, not the scene.
- Regenerate scenes, not reels. The chunked structure means a bad gym shot costs you one 6-second regeneration, never the whole video.
- Lead with location for new launches. The Singapore agents always give a scene to transport links — in any market, “5 minutes to the station” converts better than a second pool angle.
- Disclose that renders are renders. If the project is unbuilt, say so in the caption or on screen. Your regulator (and your buyers) will thank you.
Frequently Asked Questions
How does the AI keep the same agent in every scene?
MiniMax H3’s reference-to-video mode accepts reference images and preserves the people and places in them. Include the same presenter portrait in every scene’s references and the generated footage keeps the same face, hair, and outfit across independently generated clips.
Can the AI presenter speak in my voice?
Yes. MiniMax H3 accepts an audio reference and clones its timbre — prompt it with Voice timbre follows reference audio 1. You can use a Text to Speech clip, or clone your own voice first and generate the reference clips with it, so the on-camera presenter and the voiceovers all sound like you.
How much does a reel like this cost?
The five video scenes were the bulk of it: our 40 seconds of MiniMax H3 at 768p cost 114 credits. Reference images, voiceover audio, music, and the 2-credit editor export add a little on top. Regenerating one bad scene costs a fraction of regenerating a single long take.
Is 768p sharp enough for Instagram and TikTok?
For feed playback, yes — both platforms compress aggressively, and the editor exports the assembled timeline at 1080×1920. If you want maximum sharpness for a projector or a sales gallery screen, generate the scenes at a higher resolution instead.
Do I still need CapCut?
No. The merging step that agents used to do in CapCut — ordering clips, muting, captions, music, vertical export — is all built into the AI Video Editor, so the whole workflow stays in one place.
What if I am marketing an existing property with real photos?
Use your real listing photos as the reference images — the workflow is identical. We cover that variant in detail in How to Make Real Estate Videos with AI, and the pre-construction render-based version in How to Make a 30-Second Property Launch Video with AI.
Make Your First AI Real Estate Reel Today
The full pipeline — reference images, one consistent voice, five MiniMax H3 scenes, captions, music, and a vertical export — took an afternoon and no camera. Open the AI Video Generator, generate your presenter, and build the reel your next launch deserves.