
Open or start a project
Open Videos > Video Editor. Your projects are under Recent Projects; click one to open it.- New Project starts an empty project in 16:9.
- A project’s menu has Duplicate, Share with Team (on Teams plans), and Delete. Deleting a project can’t be undone.
Add media
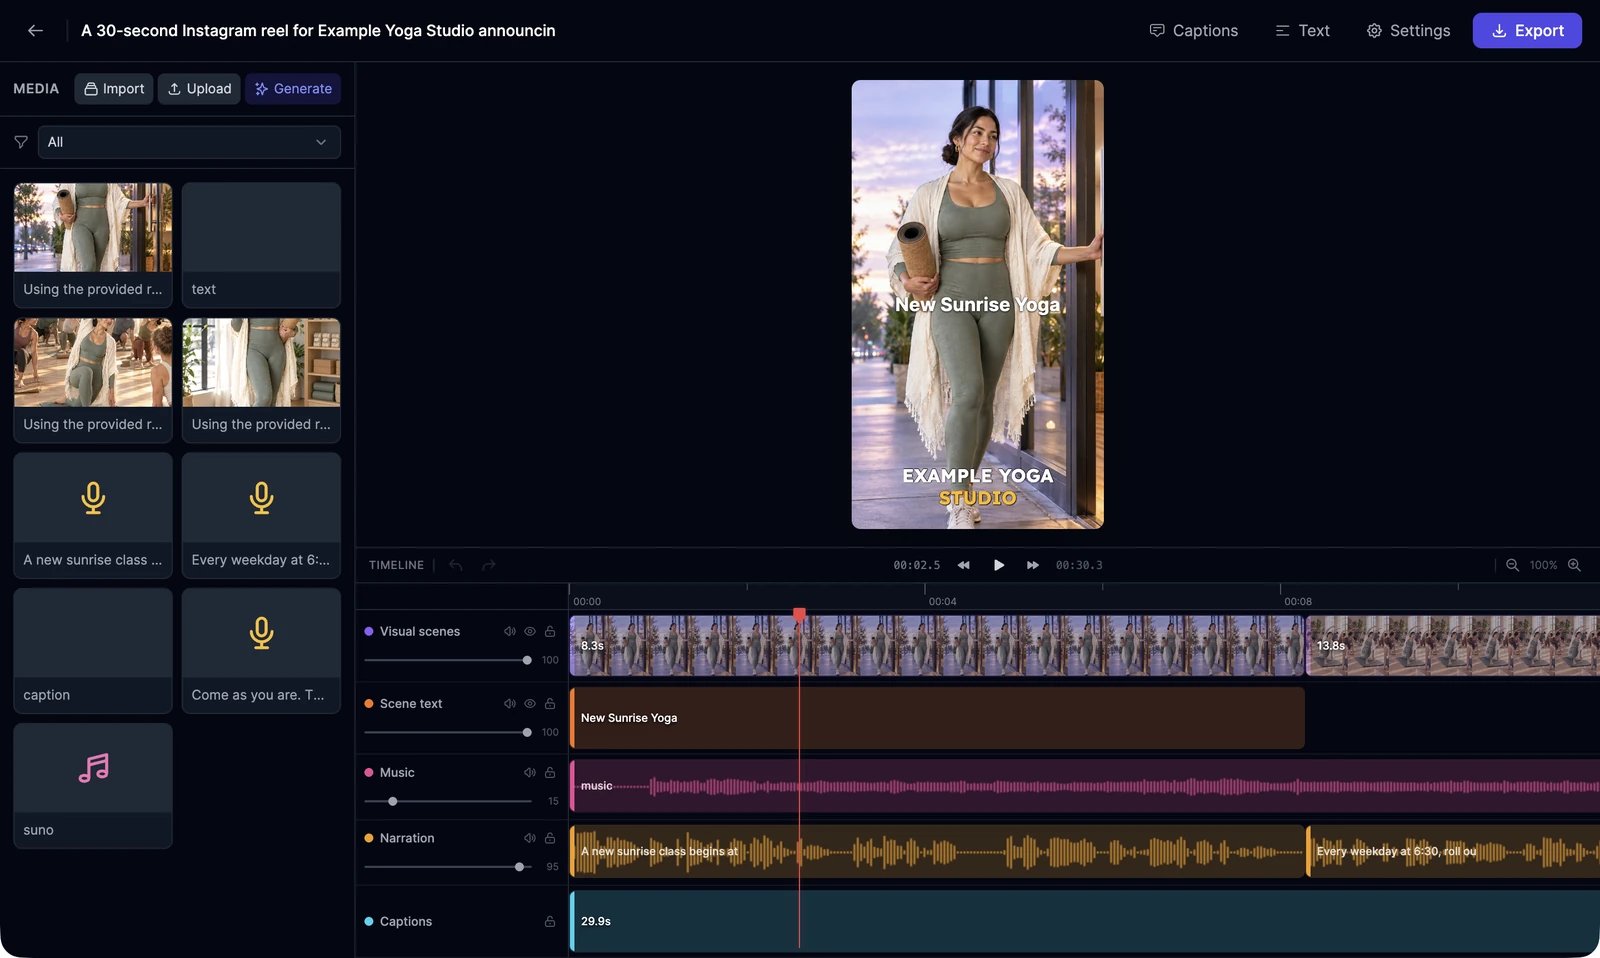
The Media panel on the left holds everything in the project.
Click Add on a media card, or double-click it, to put it on the timeline.
Work on the timeline
- Move a clip by dragging it. Trim it by dragging either edge. Clips on the same track can’t overlap.
- Play, pause, and jump 5 seconds back or forward with the controls above the tracks.
- Delete removes the selected clip. You can also press Delete or Backspace.
- Undo and Redo: Ctrl+Z and Ctrl+Shift+Z (⌘ on a Mac).
- Zoom the timeline from 25% to 400%.
- Each track can be muted, hidden, or locked, and has its own volume.
Change a clip
Click a clip to open Clip Properties.
Text at the top adds a new text clip.
Regenerate a clip with AI
Not happy with one scene? Select it and use Regenerate with AI at the top of Clip Properties. You don’t have to remake the whole video.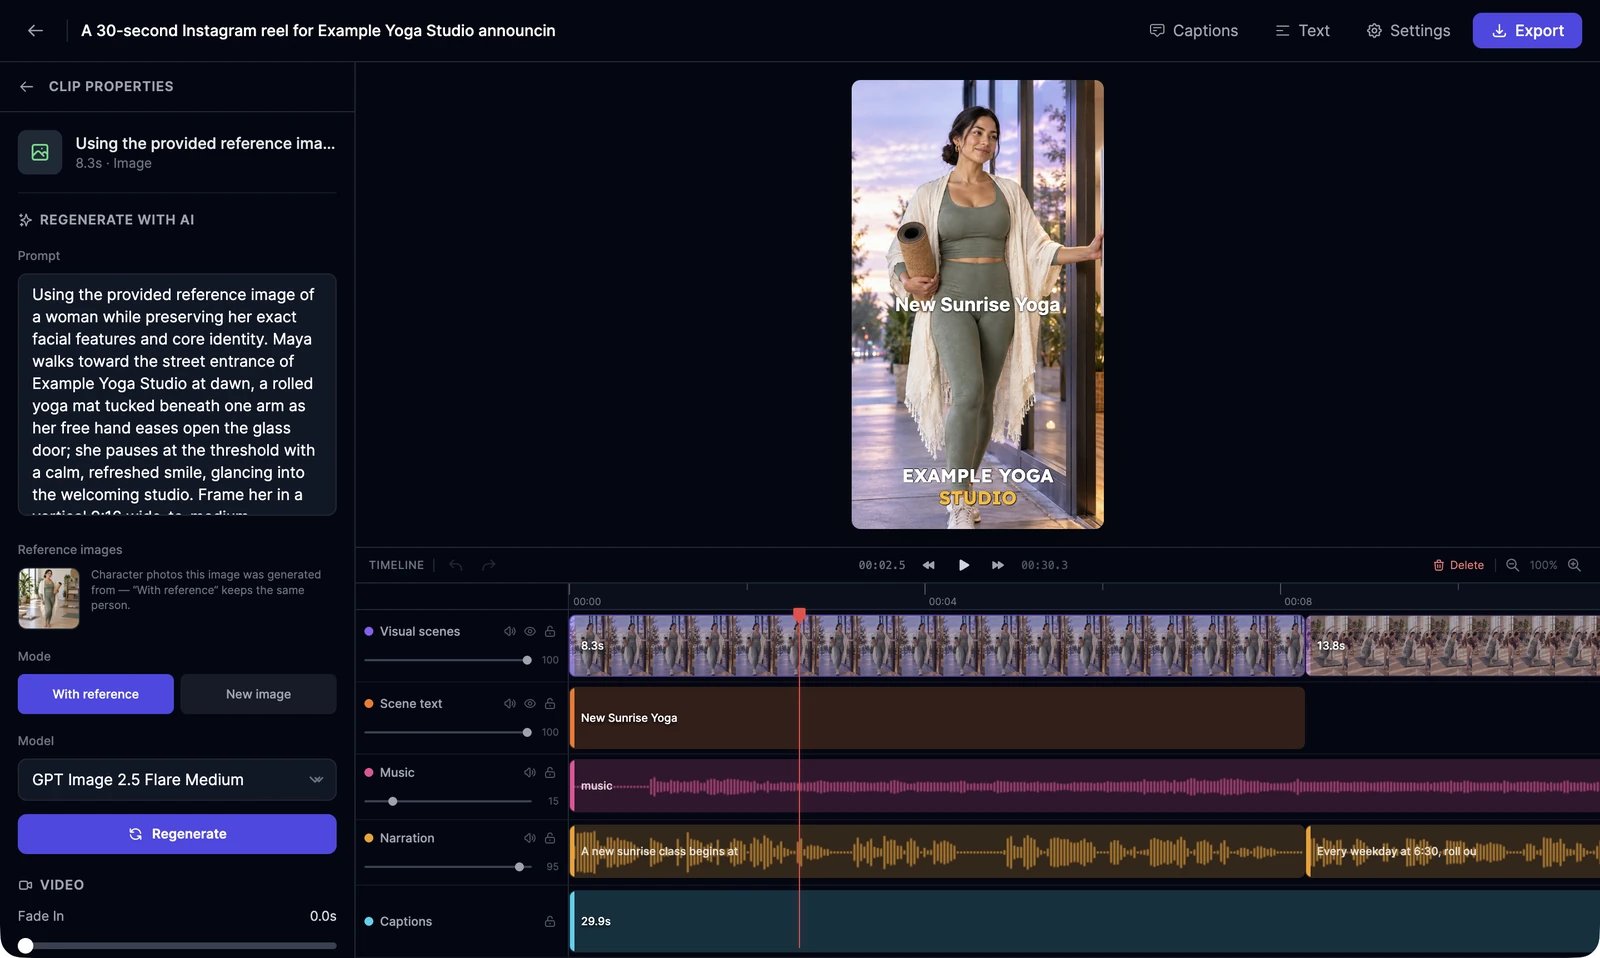
Captions
Click Captions to caption your video. Generate Captions transcribes the voiceover and video clips you select, in the language you choose or with Auto-detect. Captions are free, but you need at least 1 credit left to make them. Click a caption clip to style it in Caption Properties: the style, position, font size, how many words show at once (Words per page), and the Highlight Color of the word being spoken. Apply style to all captions copies the style to every caption. To fix words or timing, click Edit caption text: edit each line and its start and end times, merge or split lines, or use Find and Replace with.Export your video
1
Click Export
Export Video shows the project details. Choose 1080p (Full HD) or 4K (Ultra HD).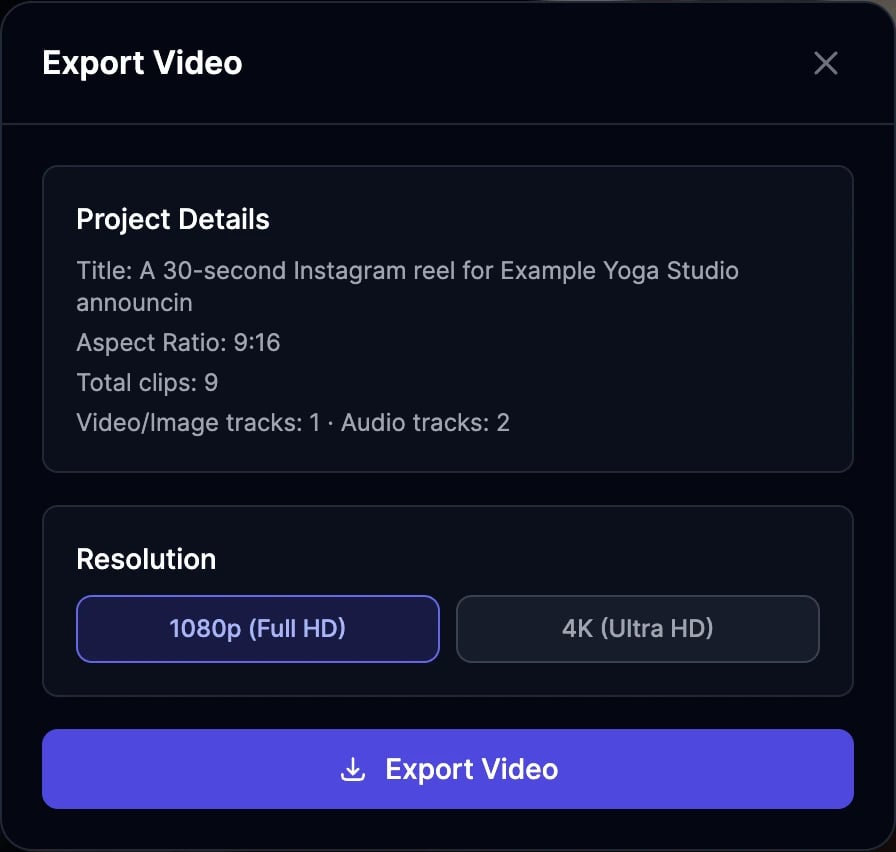
2
Click Export Video
Rendering takes a few minutes and shows its progress. Keep the editor open until it finishes; you can close the export window itself.
3
Download
When you see Export complete!, click Download Video. The MP4 is also saved in History > Videos.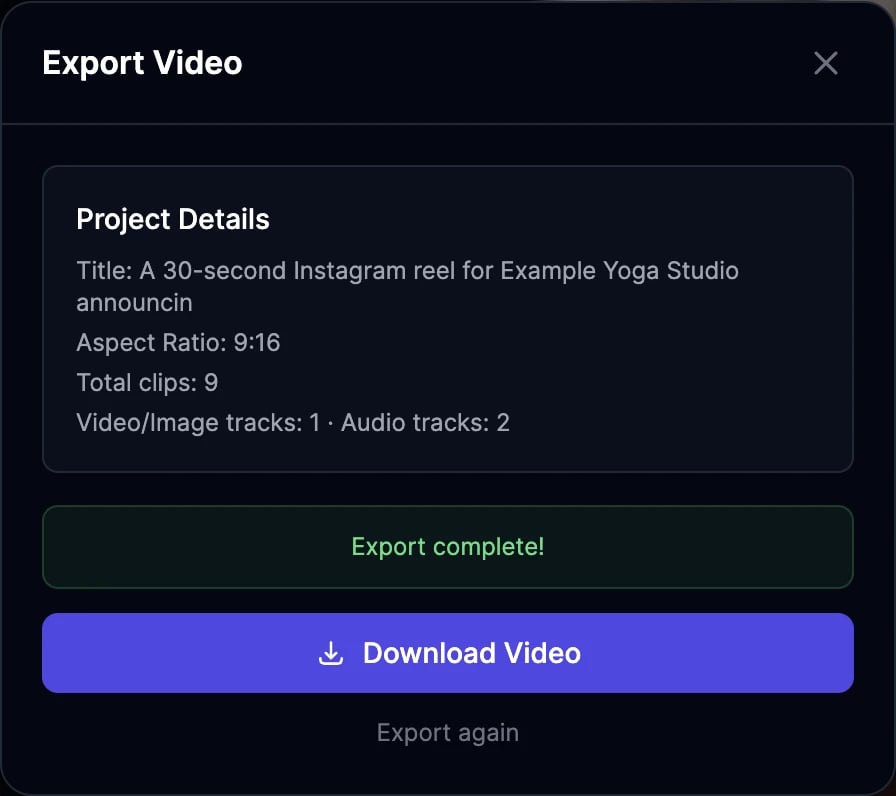
Video Agent
Start a project from one sentence.
Manage your videos
Find, download, and share your exports.