
Email is available on paid plans.
Connect email
1
Open the Email channel
Open your agent, click Channels, and click Connect on Email.
2
Set how replies look
Click Save.
3
Copy the agent's address
Open the Email window again. Your agent email address now shows the agent’s address, ending in 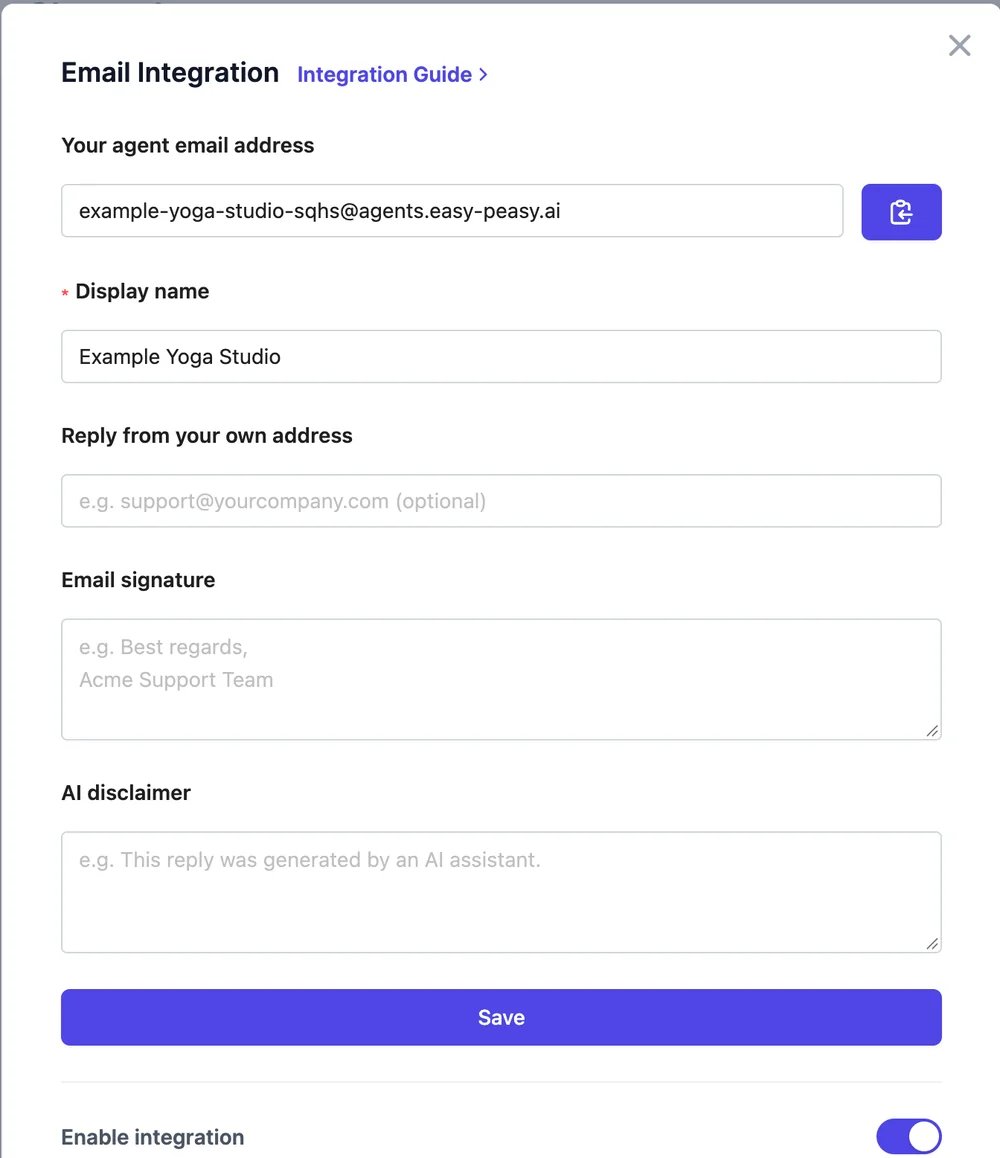
@agents.easy-peasy.ai. Copy it with the button next to it. The address doesn’t change.4
Forward your support mailbox (optional)
In your email provider, forward your support address to the agent’s address:
- Gmail and Google Workspace: Settings > Forwarding and POP/IMAP > Add a forwarding address, or a routing rule in the Admin console.
- Outlook and Microsoft 365: Settings > Mail > Forwarding, or a mail flow rule in the admin center.
- Other providers: look for forwarding or redirect rules.
5
Send a test email
Email a question to the agent’s address from a personal address. The reply usually arrives within a minute, in the same thread. Reply again to see the agent keep the context.
Reply from your own domain
By default, replies come from Easy-Peasy.AI’s mail servers with your display name, and replies to them go to the agent. To send from your own address, such as[email protected]:
- Enter it in Reply from your own address and click Save. Addresses on free mail services such as Gmail can’t be used.
- Domain verification shows a TXT record and a CNAME record. Add both at the company that manages your domain’s DNS.
- Click Verify domain. DNS changes can take up to 48 hours. When the status shows Verified, replies come from your address.
What the agent answers
- Each sender’s thread keeps its history, so follow-up emails are answered in context.
- Auto-replies, out-of-office messages, mailing lists, bounces, and spam are ignored, so the agent never gets stuck replying to machines.
- Your actions work in email.
Instructions and model
Tell the agent what to do when it doesn’t know.
Channels
All the places your agent can answer.